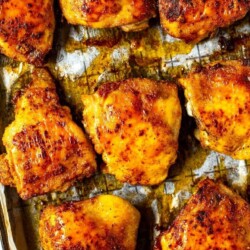
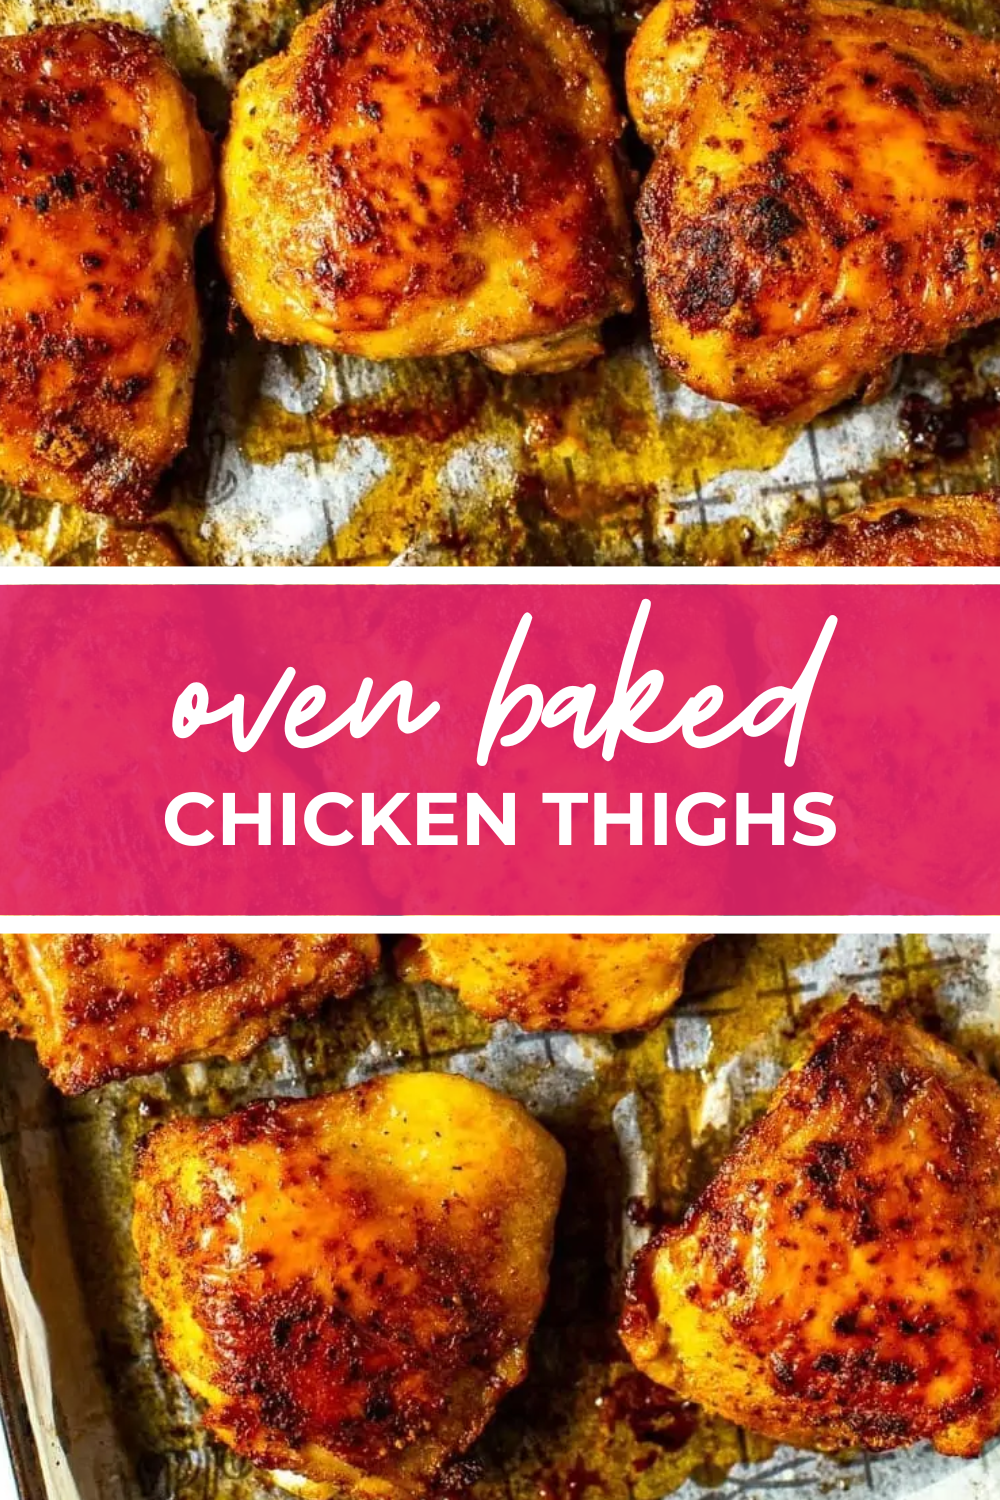
These are the Best Oven Baked Chicken Thighs! Get crispy and juicy chicken every time – you’ll want to devour them all!
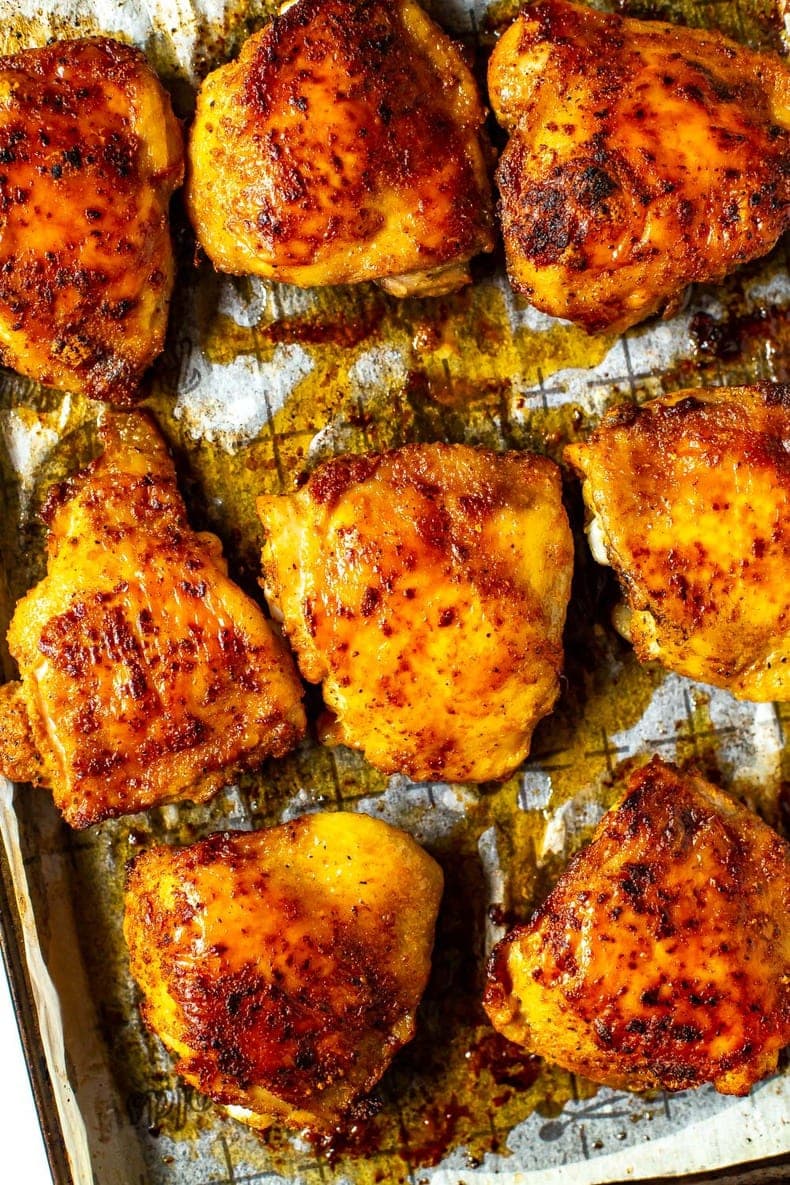
The spice blend I use on these is one of my all-time favourites. Every time I serve these chicken thighs, my friends and family demolish them!
Why you’ll love this recipe
- Crispy, juicy, foolproof: Get perfectly crispy-skinned chicken thighs every time with this easy oven-baked method.
- Budget-friendly: Bone-in, skin-on chicken is cheaper than boneless and skinless, plus it locks in extra flavour.

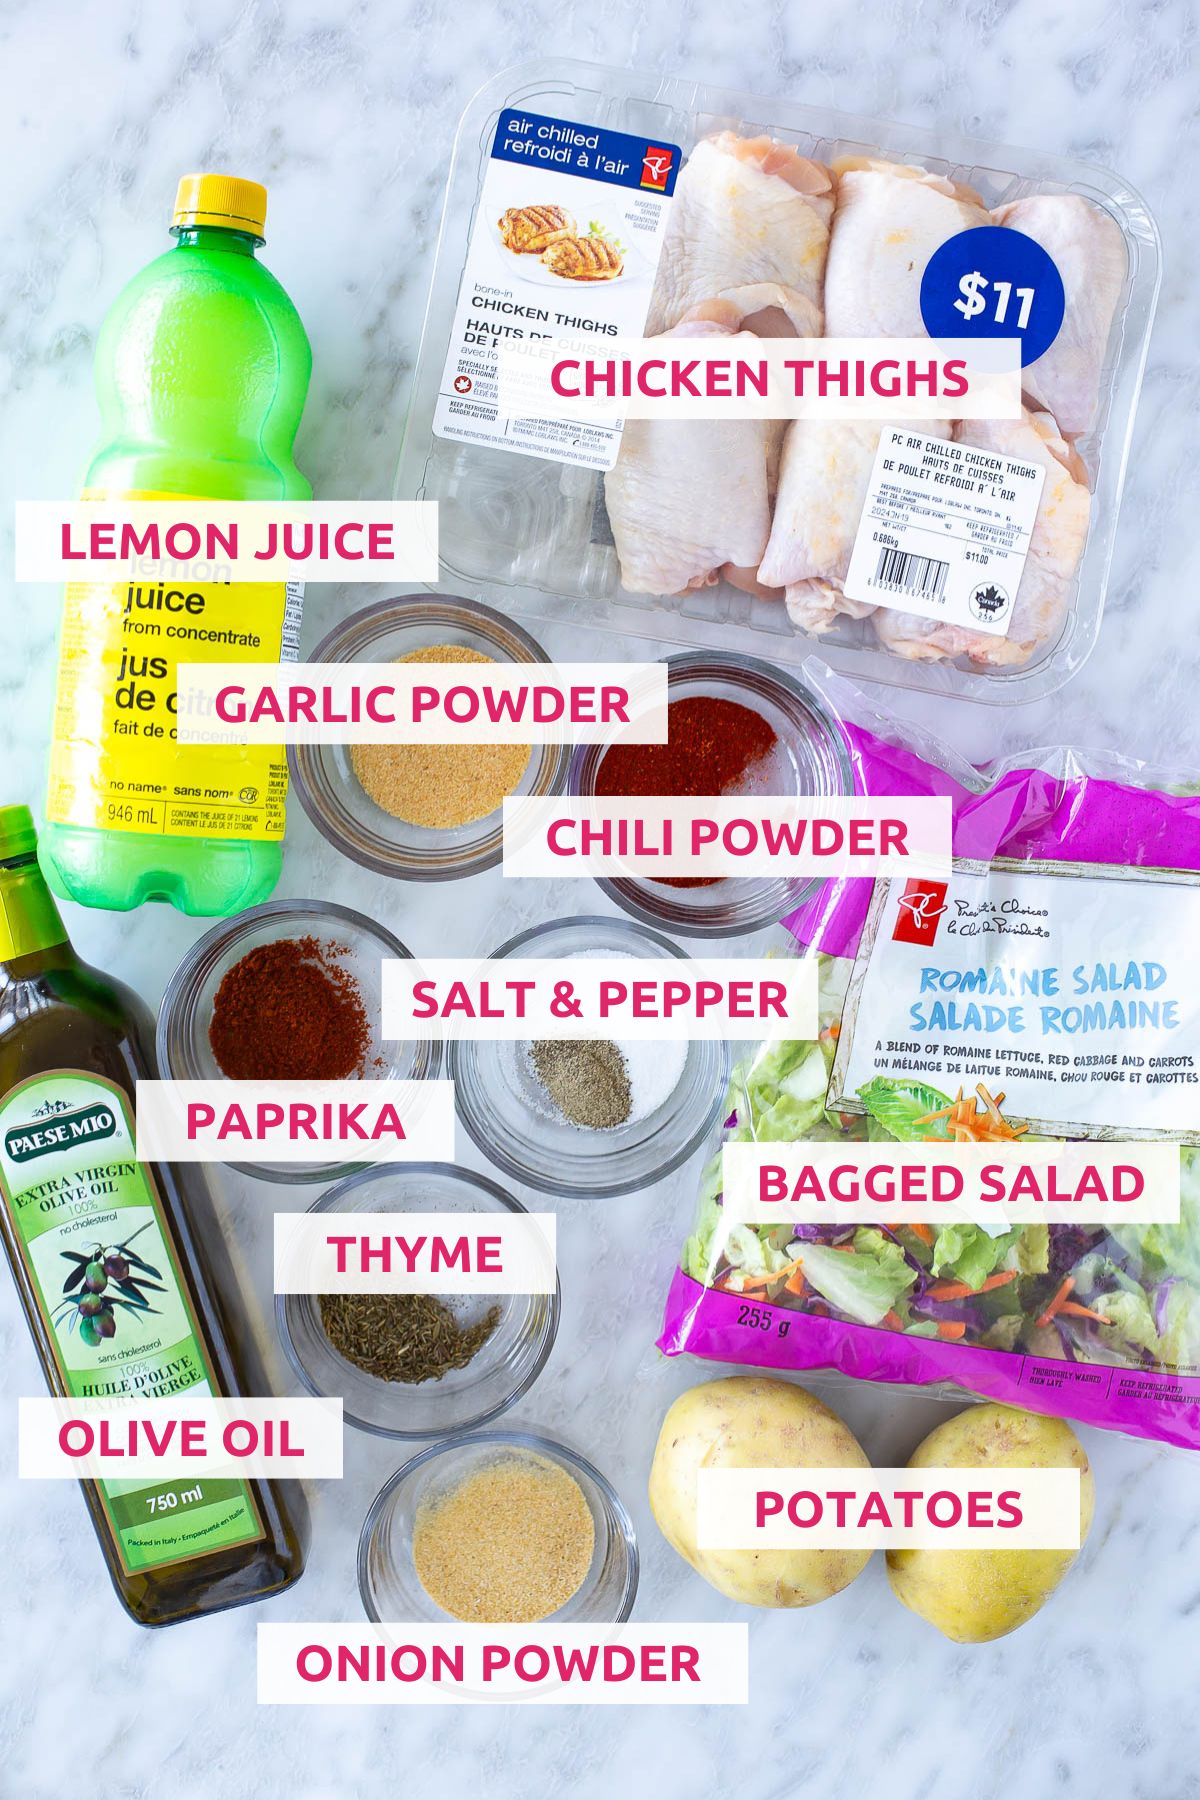
Ingredients and substitutions
- Chicken thighs – bone-in, skin-on thighs work best for this recipe, but you can use boneless, skinless thighs if preferred, just adjust the cooking time.
- Lemon juice – freshly squeezed lemon juice is ideal, but bottled lemon juice works in a pinch.
- Olive oil – substitute with avocado oil or another neutral oil if needed.
- Garlic powder – swap it for minced fresh garlic for a more robust taste.
- Chili powder – use smoked chili powder for extra depth or leave out if you prefer milder flavors.
- Paprika – regular or smoked paprika will work; smoked adds a nice, smoky flavor to the chicken.
- Thyme – dried thyme works well, but you can use fresh thyme for a brighter flavor.
- Onion powder – swap with finely minced fresh onion if desired.
- Potatoes – you can use Yukon gold or red potatoes or baby potatoes. Sweet potatoes are another option.
- Bagged salad – feel free to mix and match your favorite greens and veggies for a custom salad.
How to make these irresistible chicken thighs
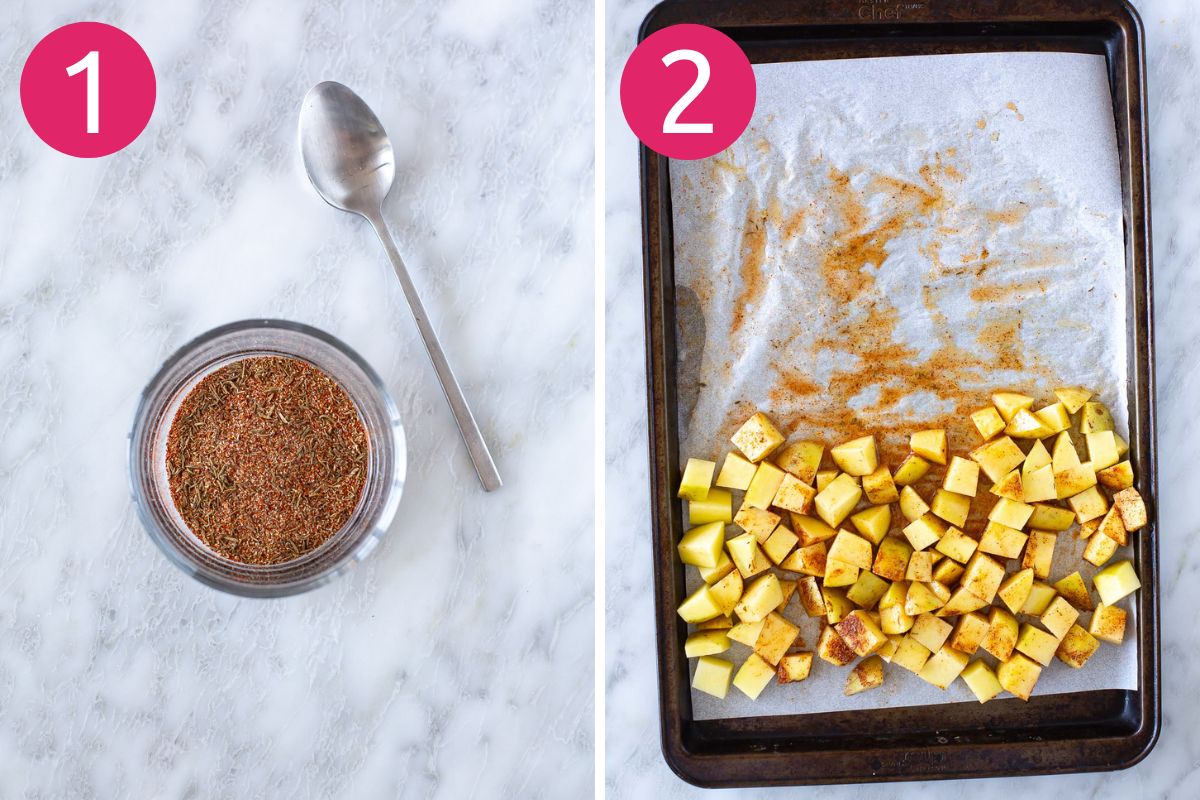
Step 1: Make the spice blend.
Mix together the spice blend ingredients in a small bowl.
Step 2: Season the potatoes.
Add the potatoes to a baking sheet and toss with olive oil, lemon juice, and the spice blend.

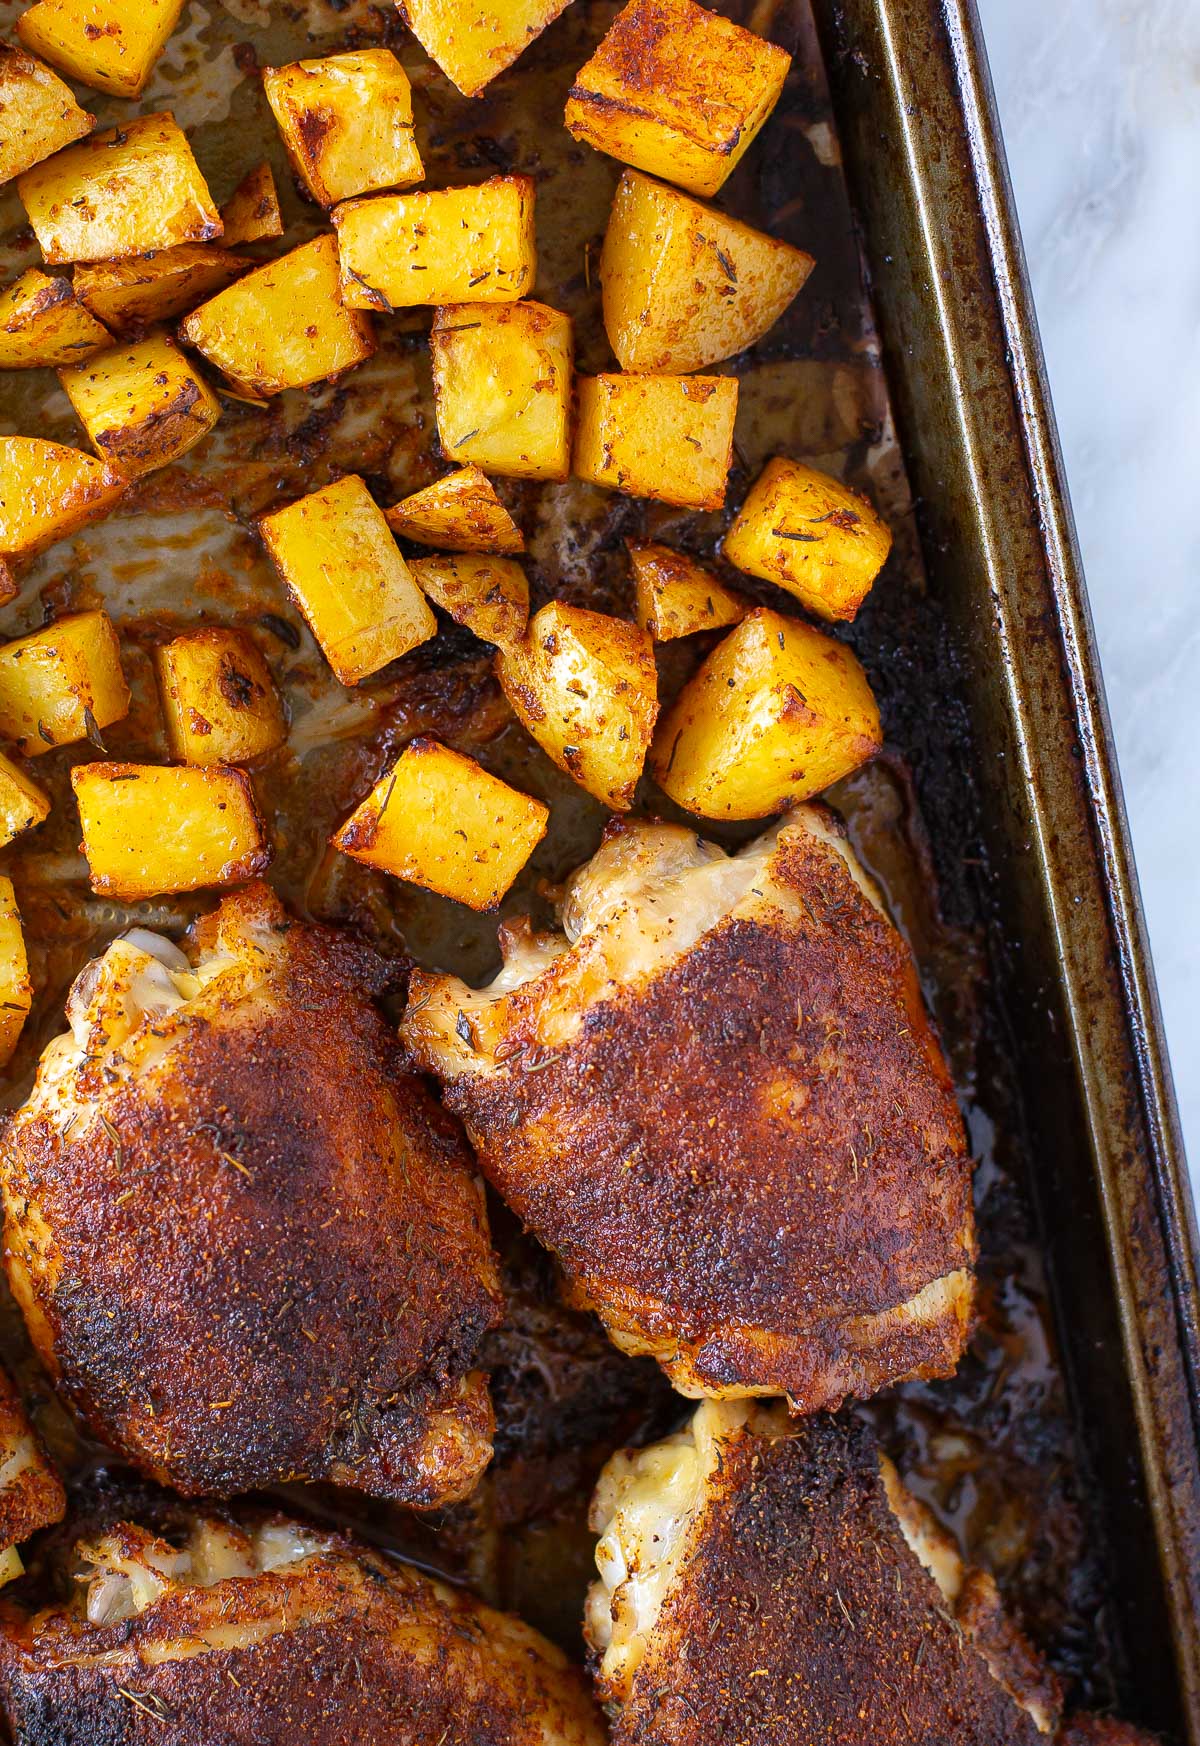
Step 3: Bake the chicken and potatoes.
Rub the chicken with the spice blend, then bake in the oven until cooked through.
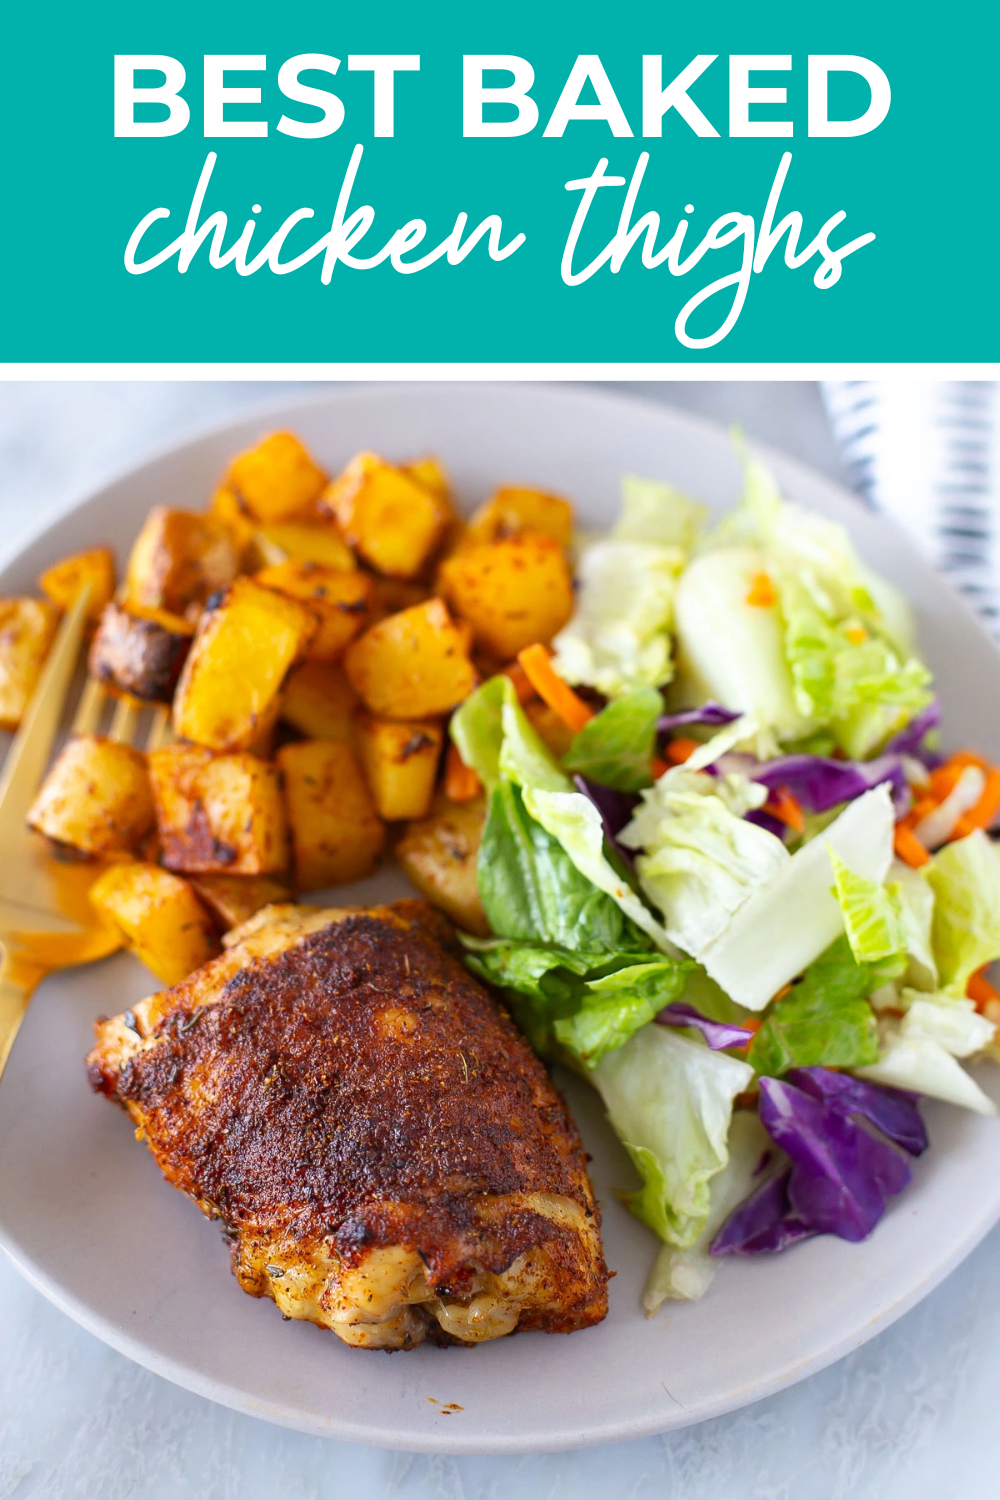
Step 4: Serve and enjoy!
You’re all ready to eat!

Recipe Tips & Variations
These baked chicken thighs are super versatile. Here are a few tips and ideas to make them your own:
- Use bone-in or boneless: Bone-in thighs stay extra juicy, but boneless cook a little faster.
- Change up the spices: Try Cajun seasoning, lemon-pepper, Italian seasoning, Greek seasoning or your favourite spice blend to keep things interesting.
- Marinate ahead: For even more flavour, mix the seasoning with a bit of oil and marinate the chicken for a few hours or overnight.
- Crispier skin: Broil for the last 2–3 minutes to get that extra-crispy golden skin.
- Add veggies: Roast chopped potatoes, carrots, or bell peppers on the same sheet pan for an easy one-pan meal.
- Make it saucy: Serve with BBQ sauce, honey mustard, or chimichurri for different flavour profiles.
Frequently asked questions
Can I use chicken breasts instead?
Yes, but just remember to reduce the cooking time since breasts dry out faster. Pull them as soon as they’re cooked through.
How will I know when the chicken is done?
The best way to tell when your baked chicken thighs are done is to use a meat thermometer. They should have an internal temperature of 165°F.
How do I get crispy skin on my chicken?
If you want crispy skin on your baked chicken thighs, throw the chicken skin up under the broiler on high for 1-2 minutes. You will have to pay close attention here and make sure the chicken doesn’t burn. This part is optional but makes the chicken so good!
What to serve with chicken thighs
Make a full meal by serving your baked chicken thighs with one or two sides. I’ve listed 2 sides in the recipe card but here are some more ideas:
- Crispy garlic parm brussels sprouts or shaved brussels sprouts salad
- Sweet potato fries
- Roasted broccoli or broccoli salad
- Mashed potatoes
- Arugula salad or a simple green salad with healthy homemade dressing
How to store and reheat
Make ahead: Season the chicken and refrigerate for up to 24 hours before baking.
Store: Keep cooked chicken in an airtight container in the fridge for up to 5 days.
Reheat: Warm in the oven at 350 F for 10–15 minutes or microwave until heated through.
Freeze and reheat from frozen: Freeze in airtight containers for up to 3 months. Thaw in the fridge overnight, then reheat in the oven or microwave until hot.


Best Baked Chicken Thighs
Ingredients
- 6 bone-in, skin on chicken thighs
Spice blend
- 1/4 tsp paprika
- 1/4 tsp onion powder
- 1/4 tsp garlic powder
- 1/4 tsp chili powder
- 1/4 tsp thyme
- 1/4 tsp salt
- 1/4 tsp pepper
Optional side dishes
- 1 tbsp olive oil
- 1 tbsp lemon juice
- 2 Yukon gold potatoes chopped
- salt & pepper to taste
- 1 package bagged salad I like to buy a salad kit with dressing
Instructions
- Preheat oven to 400 F. Mix spice blend together in a small bowl.
- Line a baking sheet with parchment paper. If making side dishes, add potatoes, olive oil, lemon juice, 1 tsp of the spice blend and salt & pepper to taste, then toss to combine. Push potatoes off to the side of the baking sheet.
- Add chicken thighs to the baking sheet, then rub on both sides with the remaining spice blend. Bake potatoes and chicken (alternatively, you can bake chicken alone) for 45 minutes until chicken reaches internal temperature of 165 F.
- Optional: for crispy chicken skin, broil on high once cooked for 30 seconds to 1 minute, watching closely so it doesn't burn.
- Serve chicken and potatoes with a bagged salad on the side, then serve and enjoy!
Comments & Reviews
Janet says
Easy recipe, tasted very good. My husband said, that recipe is a keeper.
Taylor Stinson says
I’m so happy you enjoyed, Janet! Thanks so much for leaving a review 🙂
Mary says
Just got done making these! Just like others, 25 minutes was not enough so added 10 more and still not done so doing another 15. In total I cooked them for 50 minutes, 25 with skin down and 25 with skin up. They are still moist too. I also doubled the rub to make sure I had enough for the tops and bottoms. Skin is super crispy without putting on the broil which is awesome!! To those that complained that there are way to many words before you get to the recipe…THIS IS A FREAKING BLOG!!! If you had to read so much to get to the recipe, you should have seen the skip to recipe at the very top! Sorry Taylor, I just can’t believe people can be so rude and disrespectful
Taylor Stinson says
Hahaha, Mary – you are the best! Maybe this is worth a retest with different-sized chicken thighs. The ones I’ve used are done at the 25 minute mark (inserting the meat thermometer registers an internal temperature of 165 F) but I imagine with a larger size they may take longer. Thanks for sharing your experience and glad you enjoyed!
Faith says
This is my new favorite recipe and I’ve shared it with several others. I’m doing Bright Line Eating and part of it is to prepare meal components in advance. I just made a batch of these and have 6 – 4oz packages to put in the freezer and use as needed. I love them on top of a delicious fresh salad. I’m not eating sugar or flour, but they would be tasty in quesadillas. Thank you for this wonderful recipe!
Lynn says
Making this now…dry rub does not seem like enough for 8 thighs…I have doubled it
Lesley says
Delicious just made. Added just a touch of BBQ for extra zing ! 👍😀
Robin says
Easy, yummy and quick. Will definitely make again!
Tonya says
I’m excited to try my chicken! Although, 25 minutes at 425 wasn’t long enough for my thighs. My chicken was still red at the bone and still oozing red. They’re in the oven for an additional 10 minutes.
Taylor Stinson says
Hi Tonya – I’m wondering if you purchased much larger thighs than I used – another 10 minutes will likely do the trick. Keep in mind the chicken will continue to cook once you take it out of the oven and let it rest so be sure to use a meat thermometer to make sure the temperature is 165 F after letting them rest for 5-10 minutes. Hope you enjoy!
Kym says
Way way way way way way way way too many words to keep up with . I just want to know about chicken thighs. Born in or not.
Taylor Stinson says
Kym – the whole blog post gives you tips on how to cook chicken thighs, which is what you are saying you want to know about. If you don’t want to read the information and just want the recipe, there is a jump to recipe button at the very top of the page that takes you right to it.
Andrea says
Good point! I totally agree with you. I actually got a bit pissed for wasting my time on this website which is not very zen 🧘♂️ of me.
Taylor Stinson says
LOL again, jump to recipe button. It is a free recipe. You wasted your own time by scrolling to the bottom and bothering to comment.
Erin Wagner says
Easy recipe, quick to put together, and delicious!
Karen says
Want to try this ASAP what if I don’t have parchment paper ? Is there something else I can try ?
Taylor Stinson says
Hi Karen! You could just use some cooking spray on non-stick sheet pans and that should do the trick.