These Freezer-Friendly Homemade Pizza Pockets are SO easy to make using store-bought pizza dough and your favourite pizza toppings.

Ingredients and substitutions
- Store-bought pizza dough – you can use homemade pizza dough, but store-bought pizza dough will cut down on prep time.
- Pizza sauce – tomato sauce would also work.
- Mozzarella cheese – freshly grated pizza mozzarella is best, but you can use a pre-shredded blend if it’s all you have on hand. Feel free to add on different cheeses as well like parmesan cheese.
- Pepperoni slices – substitute for another protein of your choice like sausage, bacon or chicken, or leave the meat off altogether.
- Mushrooms, green peppers and red onion – use any combination of veggies or toppings of your choice like pineapple, olives, roasted red peppers and more.

How to make pizza pockets
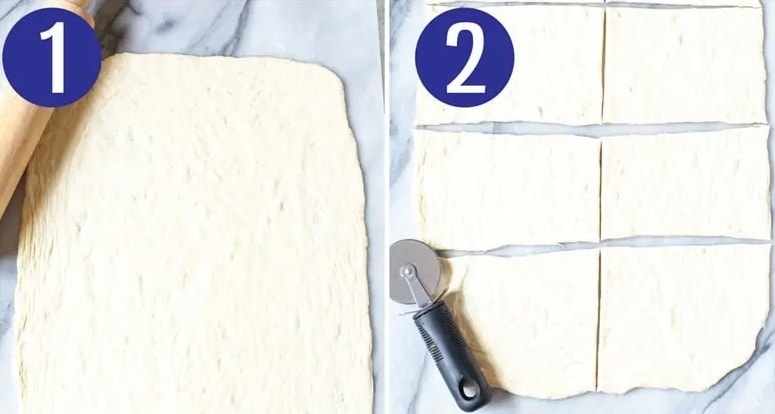
Step 1: Roll out the dough.
Roll out pizza dough until it is about 1/4 inch thick.
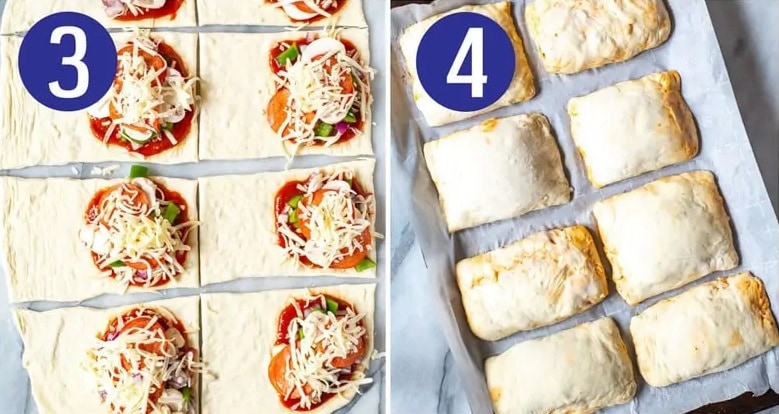
Step 2: Cut the dough.
Cut into rectangles that will easily fold over.
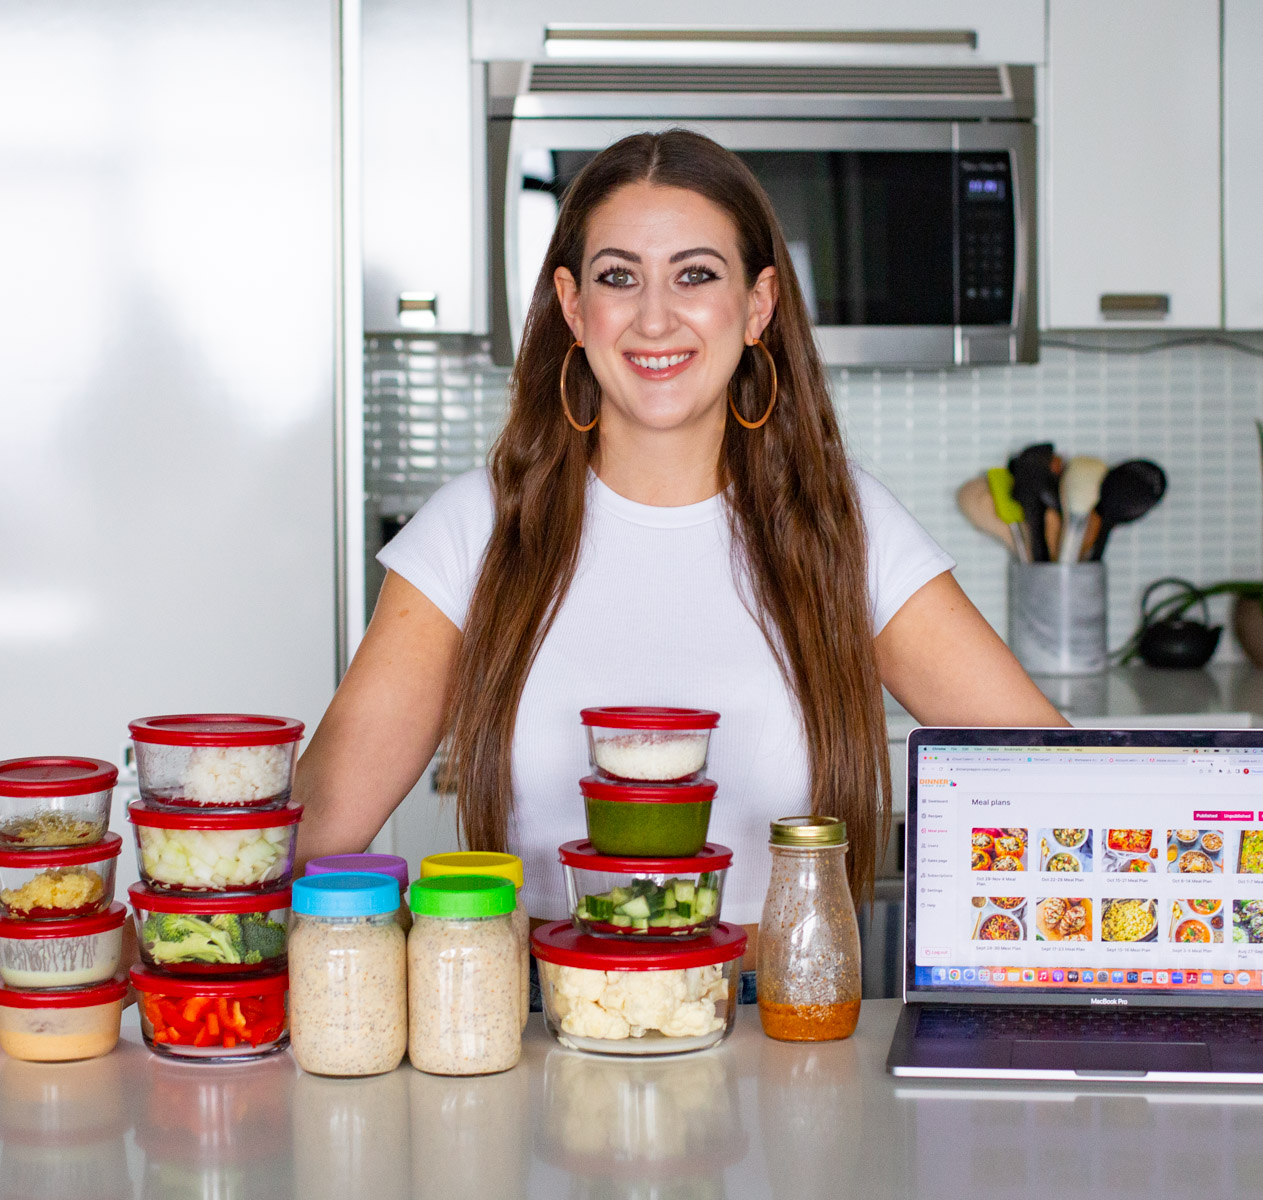
Step 3: Add on the toppings.
Spread a bit of the sauce, cheese and toppings on one half of the rectangle (leaving space around the edges for the dough). You'll want to add about 4 tablespoons of cheese, 1 tablespoon of each topping (mushrooms/green peppers), and 2 tablespoons of sauce.
Step 4: Fold the pizza pockets.
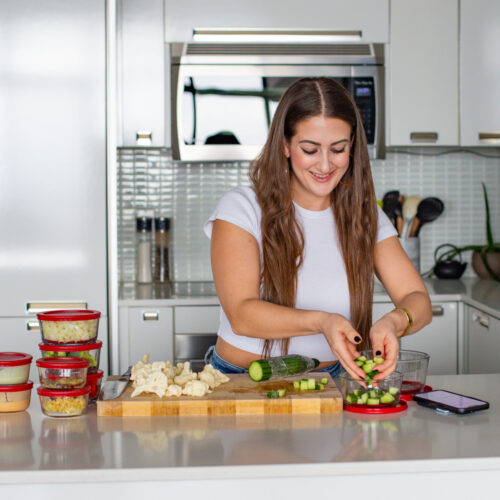
Seal all edges, using a bit of water if necessary. You can seal it with your fingers or by using a fork.

Step 5: Bake in the oven.
Bake on a baking sheet or cookie sheet lined with parchment paper for 20 minutes until dough is crisp and golden brown.
Step 6: Serve or freeze for later!
Wait 5 minutes before eating – they will be hot! Cut in half with a sharp knife then dig in.

Homemade pizza pocket tips & tricks
Follow these tips and tricks for the best homemade pizza pockets:
- Make your own dough: Mix together flour (bread or all purpose flour), water, salt, olive oil, sugar and yeast in a stand mixer bowl with a dough attachment. You can proof the yeast before adding it to the dough first by dissolving it in warm water. If the dough is too sticky, add flour. If it's too dry, add a sprinkle of water. Knead the dough, shape it into a ball and let it sit in a warm dry place for about an hour until it's doubled in size. Roll it out using a rolling pin on a lightly floured surface and voila, you have homemade pizza crust!
- Try out different toppings: Add on any pizza toppings of your choice like slices of pepperoni, sausage, bacon, chicken, pineapple, roasted red peppers, olives and more.
- Add spices and herbs: Sprinkle in some oregano, garlic powder, basil or any other seasonings of your choice to give your pizza pockets extra flavour.
- Serve with your favourite dips: Enjoy your pizza pockets on their own or with your favourite dipping sauces like ranch, blue cheese or creamy garlic.
Frequently Asked Questions
One of my favourite things about this pizza pocket recipe is that you can change up the toppings and try out different combinations. Any standard pizza topping will work great, but you can try other combinations too! Some ingredient ideas include chicken, sundried tomatoes, broccoli, ham, olives, spinach, bacon, alfredo sauce and pesto.
These homemade hot pockets get crispy by baking in the oven. There’s no deep frying required, so they’re much healthier than the frozen variety from the grocery store!
I prefer my pizza pockets to be oozing with melted cheese. If that’s what you are going for, use fresh mozzarella cheese. Cheese that is purchased already shredded is covered in potato starch to keep it fresh, which prevents it from fully melting and becoming that ooey gooey cheese you're going for. In order to get the cheesiness, you'll want to use a ball of pizza mozzarella for best results. You can also try using gouda, cheddar, goat, ricotta, Swiss or provolone for a different flavour.
Yes! You can freeze these pizza pockets for up to 3 months. When you're ready to enjoy, you don't need to worry about defrosting them. You can reheat them right from frozen in the microwave for 2-4 minutes or in the oven for 20 minutes at 425° F.

Storing and reheating
Homemade hot pockets will last in the fridge for up to 5 days in airtight glass containers and are a great option for an easy and quick lunch or an after-school snack for kids. You can heat them up in the microwave for 2 to 3 minutes or stick them in the oven for 10 to 15 minutes at 375° Fahrenheit to get that nice crispy finish.
Freezing this recipe
This pizza pocket recipe is definitely freezer-friendly. You can make a big batch then enjoy them whenever you're craving some pepperoni pizza pockets! After they’ve baked and cooled, wrap each pizza pocket in plastic wrap then freeze them in a Ziploc bag for up to 3 months. Reheat them right from frozen in the microwave for 3 to 4 minutes, or in the oven for about 20 minutes at 425° Fahrenheit.


Make healthy eating easy! Join our Dinner Prep Pro app.
- ZERO ADS on over 450 recipes
- Customizable weekly meal plans
- Grocery and meal prep checklists
- Bonus resource library and community
Meal Prep Tools
- Get your square glass meal prep bowls here – they are great for storing leftovers!
- And of course I get all my free-range and grass-fed proteins from Butcher Box.
- **Get my full list of tools here**

Freezer-Friendly Homemade Pizza Pockets
Ingredients
- 1 ball store bought pizza dough
- 1 cup pizza sauce
- 2 cups mozzarella cheese grated
- 1/2 cup pepperoni I used turkey pepperoni
- 1/2 cup mushrooms sliced
- 1/2 green pepper diced
- 1/2 red onion, diced
Instructions
- Preheat oven to 425 F.
- Roll out pizza dough until it is about 1/4 inch thick. Cut into rectangles that will easily fold over. On one half of the rectangle, spread a bit of sauce, cheese and toppings, leaving space around the edges for the dough to touch together. NOTE: you only want about 1 tbsp per topping (eg 1 tbsp mushrooms, 1 tbsp green pepper, etc.)
- Seal all edges, using a bit of water if necessary. Bake on a parchment lined baking sheet for 20 minutes until dough is crisp and golden. Wait 5 minutes before eating – they will be hot!
- TO FREEZE: You can also freeze pizza pockets for up to 3 months. If freezing, make sure to freeze them after you have baked them in separate freezer bags, and then microwave for 1-2 minutes to thaw. Place paper towel over pizza pocket and then microwave another 1-2 min to completely heat through. You can also freeze raw, then bake for 30-40 minutes from frozen for fresh pizza pockets.


Comments & Reviews
Emily says
Could you write this recipe again but for breakfast pizza pocket ?
Taylor Stinson says
That’s a great suggestion for a new recipe! I’ll consider creating one and putting it in our content calendar. In the meantime (without doing any recipe testing), I’d suggest cooking however much breakfast sausage or bacon you think you’d need, scrambling some eggs, dicing some bell pepper and red onion and adding all of that plus shredded cheese and pizza sauce to each little square of pizza dough.
Laura says
What dimensions should the rectangles be? Eyeballing this sort of thing is not my strong suit, lol.
Taylor Stinson says
I don’t have exact dimensions but I’m thinking it would be 3×4 inches if I had to guess?
Lori says
How many does this make? Thank you.
Taylor Stinson says
It makes 8, it’s listed in the recipe card.
Liz says
Looks so good I will try in tonight.
Would it be ok to use W/W flour?
Thanks
Liz
Taylor Stinson says
Hi Liz – do you mean whole wheat flour? I think that would be fine!
Melanue says
Do you really mean 1/2 inch thick? That’s a centimetre! Cookies are 1/4″ and pie crust is 1/8″. Is it a typo?
Do you mean 1/2 cm?
Taylor Stinson says
Hi Melanie – yes, that was a typo. I have updated to 1/4 inch thick.
Sarah Reid says
What’s the weight of the dough ball? I make my own and was looking for an approximate weight
Taylor Stinson says
Unfortunately I don’t have a weight but will update the recipe the next time I go to the grocery store and take a look at what the average weight is of most store bought pizza dough.
Sarah says
I am so exited to make this this is a easy meal a that a kid can make and I am this will be great
George Pope says
Looks delicious! & just what I was looking for!
How long to microwave the frozen product, please, to get it ready to eat?
Taylor Stinson says
Hey George – I just updated with reheating instructions. Reheat 2-4 minutes in the microwave, just make sure you have cooked them first before freezing!
Katie says
Love this! How long do you put them back in the oven for when reheating from frozen?
Gabrielle says
yes, reheating instructions would be awesome!