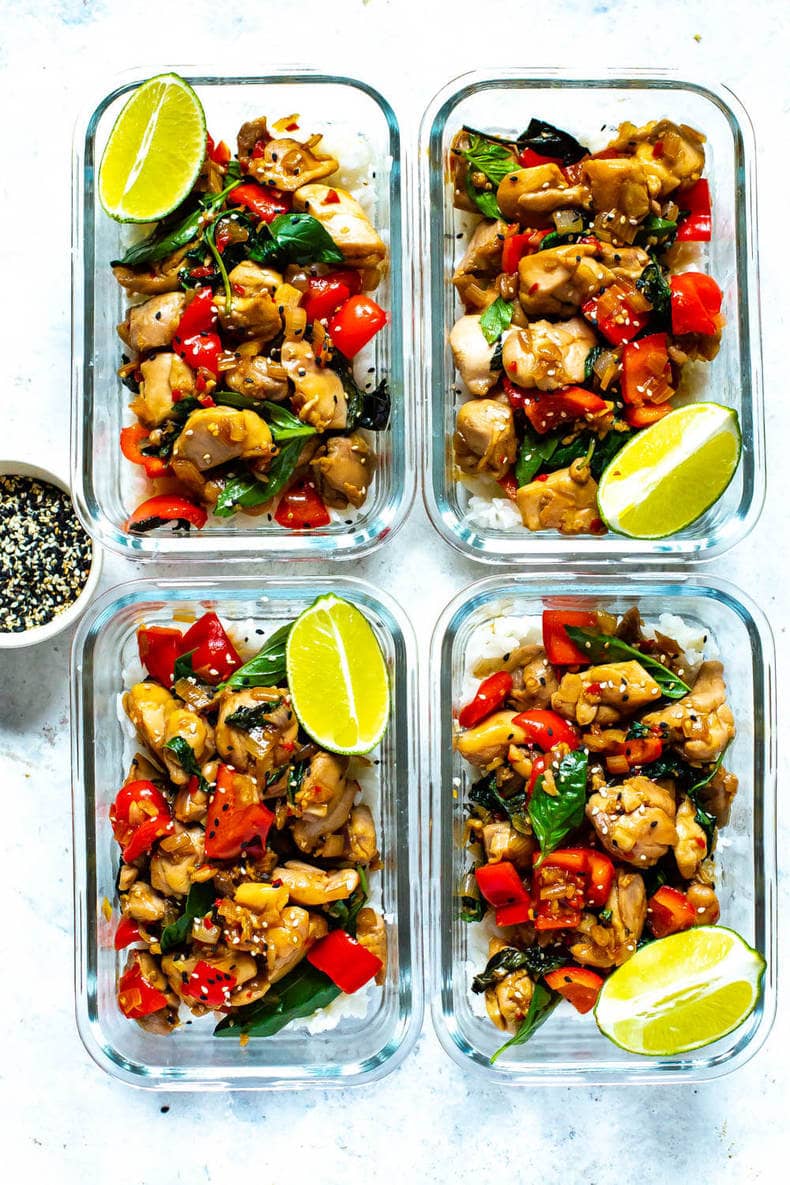
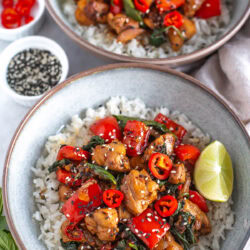
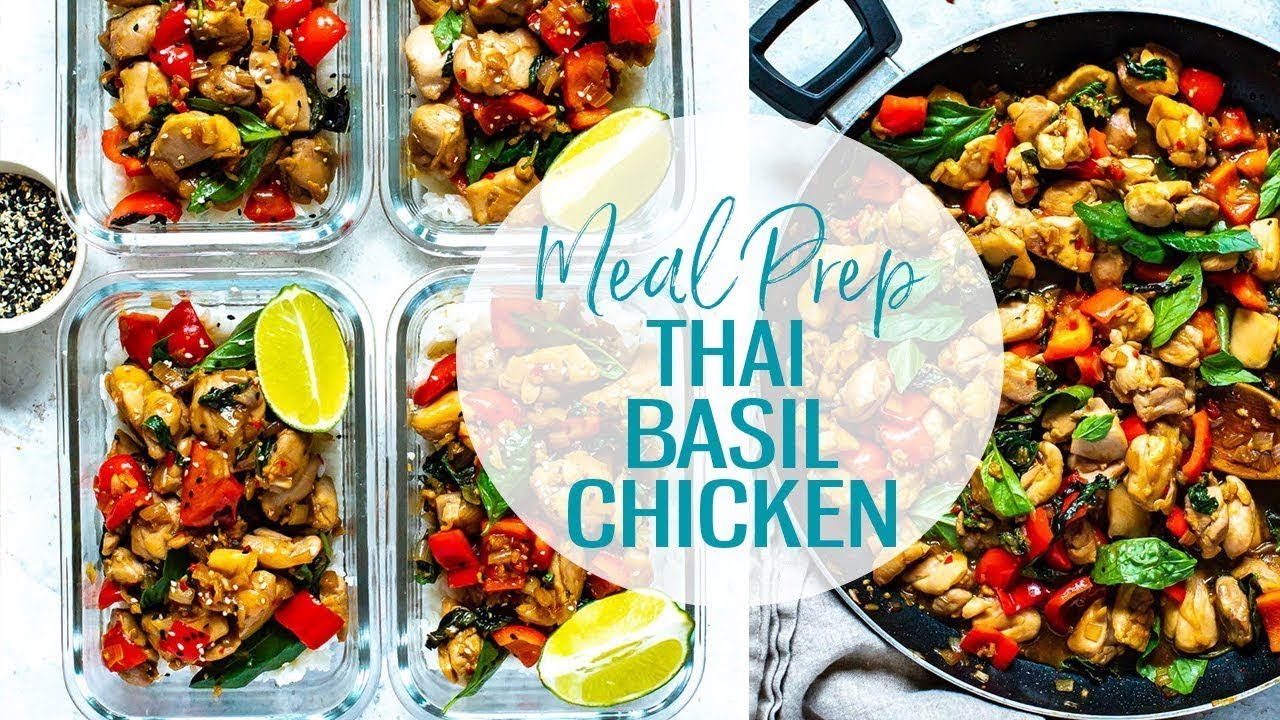
This Thai Basil Chicken recipe is a healthy stir fry idea that doubles as an easy 30-minute dinner or meal prep lunch!
If you love bold, fresh flavours this Thai Basil Chicken is next-level delicious and honestly way better than any takeout you’ve ordered. You’ve got to try it!
Why you’ll love this recipe
- Quick and easy: Ready in about 30 minutes, perfect for busy weeknights or fast meal prep.
- Healthy and satisfying: Lean protein from chicken plus veggies and rice make it a balanced, filling meal.

Ingredients and substitutions
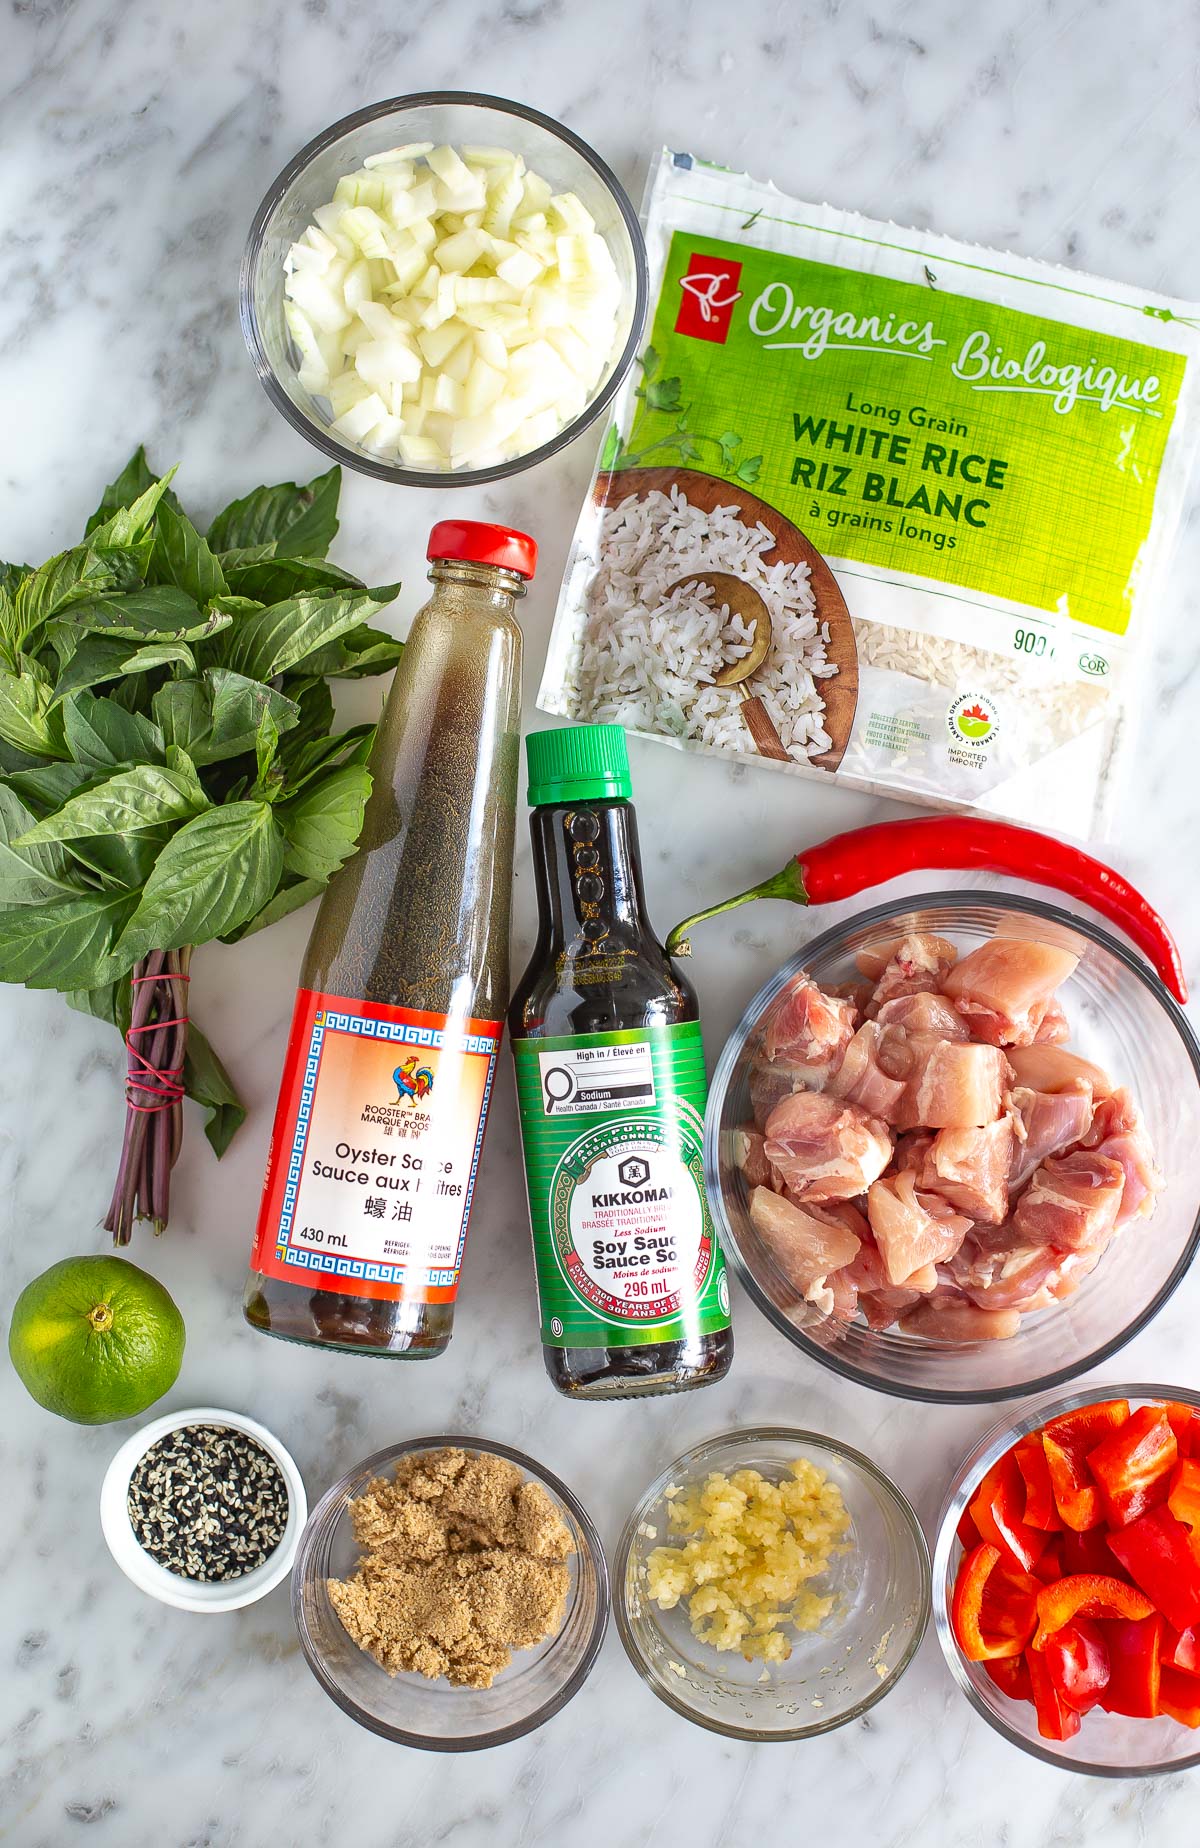
- White rice – feel free to use jasmine, basmati or brown rice with this recipe.
- Butter – margarine would also help make the rice nice and moist.
- Olive oil – use any neutral cooking oil here such as avocado, peanut, sunflower, canola or coconut oil.
- Boneless skinless chicken thighs – chicken breasts work just as well in this recipe.
- Shallots – white or yellow onions would be the best substitute.
- Red chili pepper – if you don’t like spice, feel free to leave this out or mince up some jalapeno pepper if you can’t find red chilis.
- Red bell pepper – use another colour bell pepper or another vegetable of your choice .
- Thai basil – regular basil will work as well, but the flavour will be slightly different.
- Sesame seeds & lime wedges – to garnish.
Sauce
- Low-sodium soy sauce – coconut aminos or tamari are the best soy sauce substitutes.
- Garlic – fresh minced garlic is preferred. Jarred minced garlic will work in a pinch.
- Oyster sauce – swap out for some hoisin sauce or 1 tbsp. soy sauce and 1 tbsp. honey mixed together.
- Brown sugar – honey or coconut sugar will also bring a bit of sweetness to this recipe.
If you love Thai food, you’ll also love this Drunken Noodles recipe.
How to make Thai basil chicken

Step 1: Make the sauce
Whisk together the sauce ingredients in a small bowl and set aside.
Step 2: Cook the rice
Make the rice in a rice cooker or in a pot on the stovetop.

Step 3: Sauté the chicken
Add the chicken to a hot skillet and sauté until almost cooked through. shallots and chili pepper to a pan or wok and sauté until the chicken is lightly browned.
Step 4: Add the onions
Sauté the onions and chili peppers until fragrant and tender.

Step 5: Mix in the sauce
Pour in the sauce and peppers and cook until the chicken is completely cooked through.
Step 6: Finish and serve
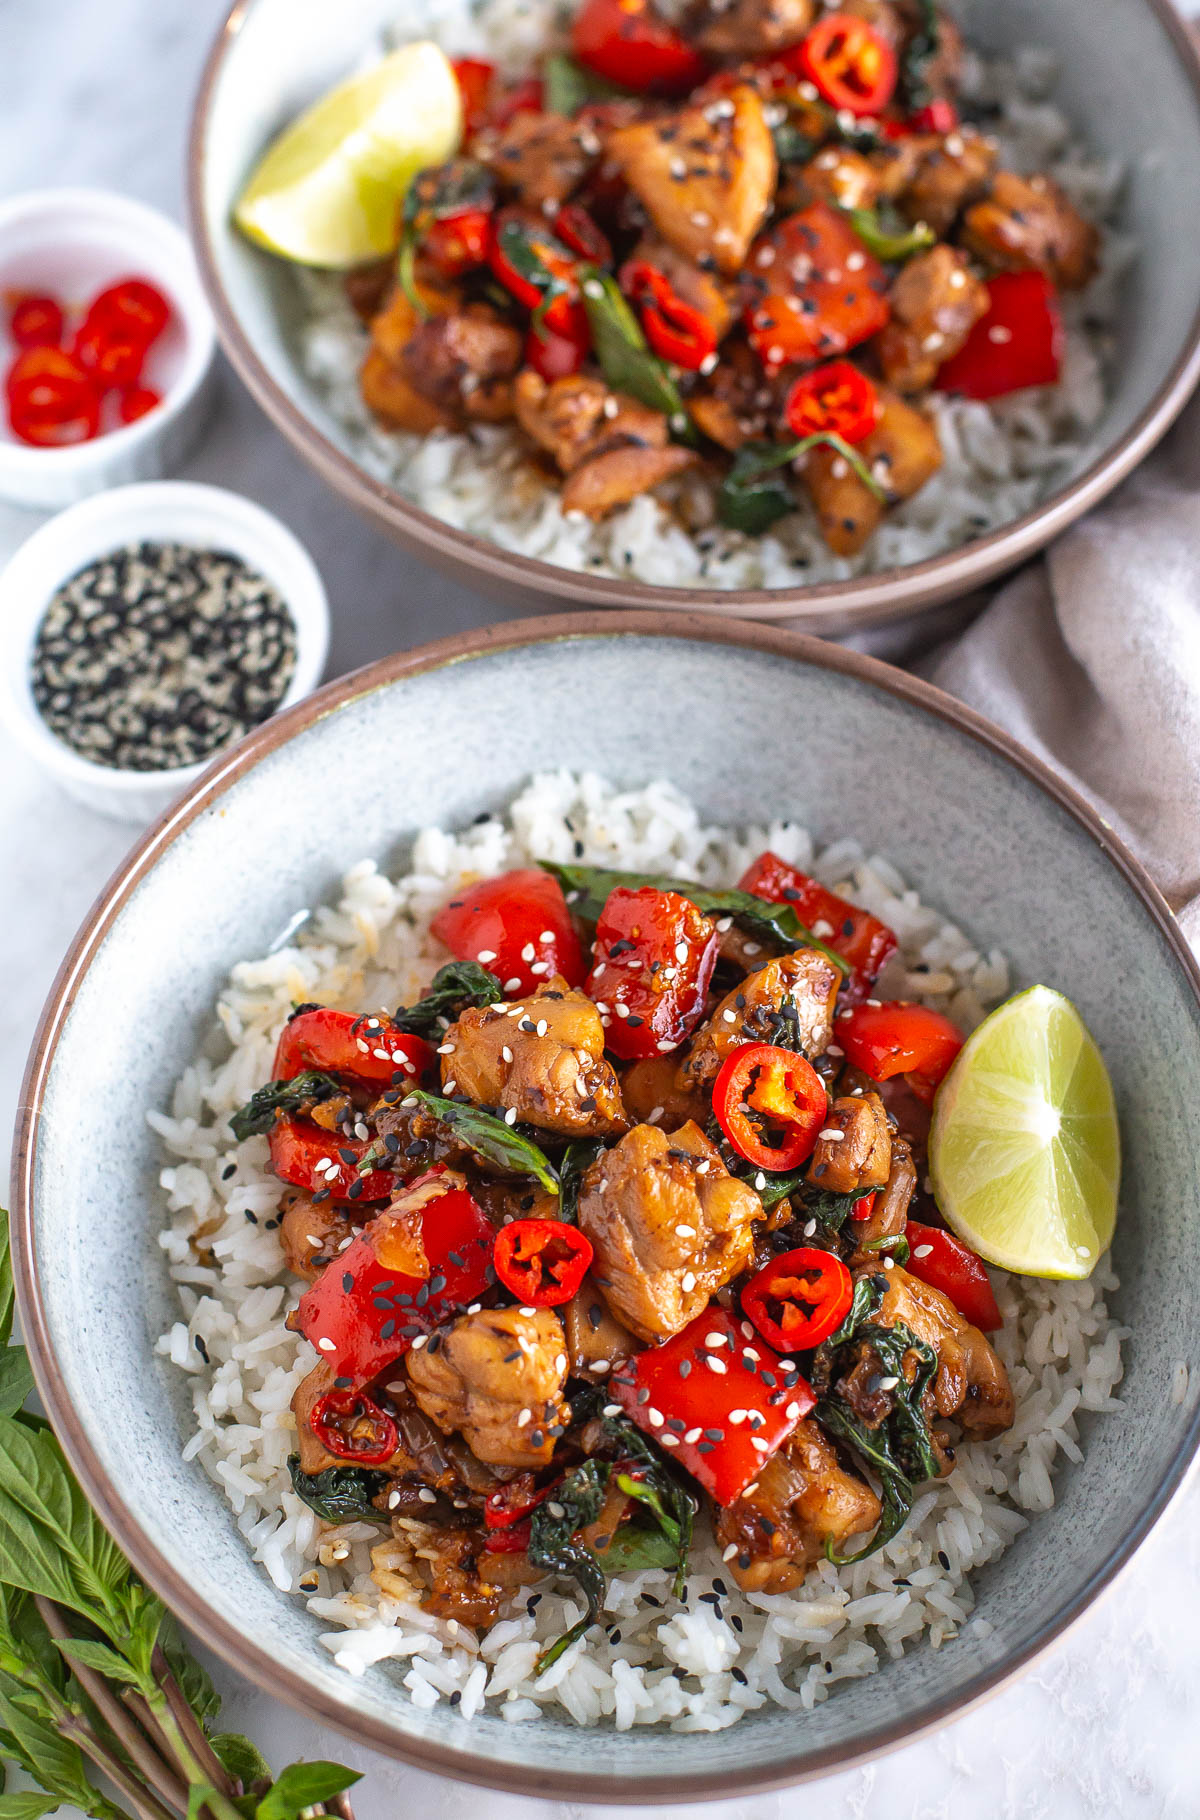
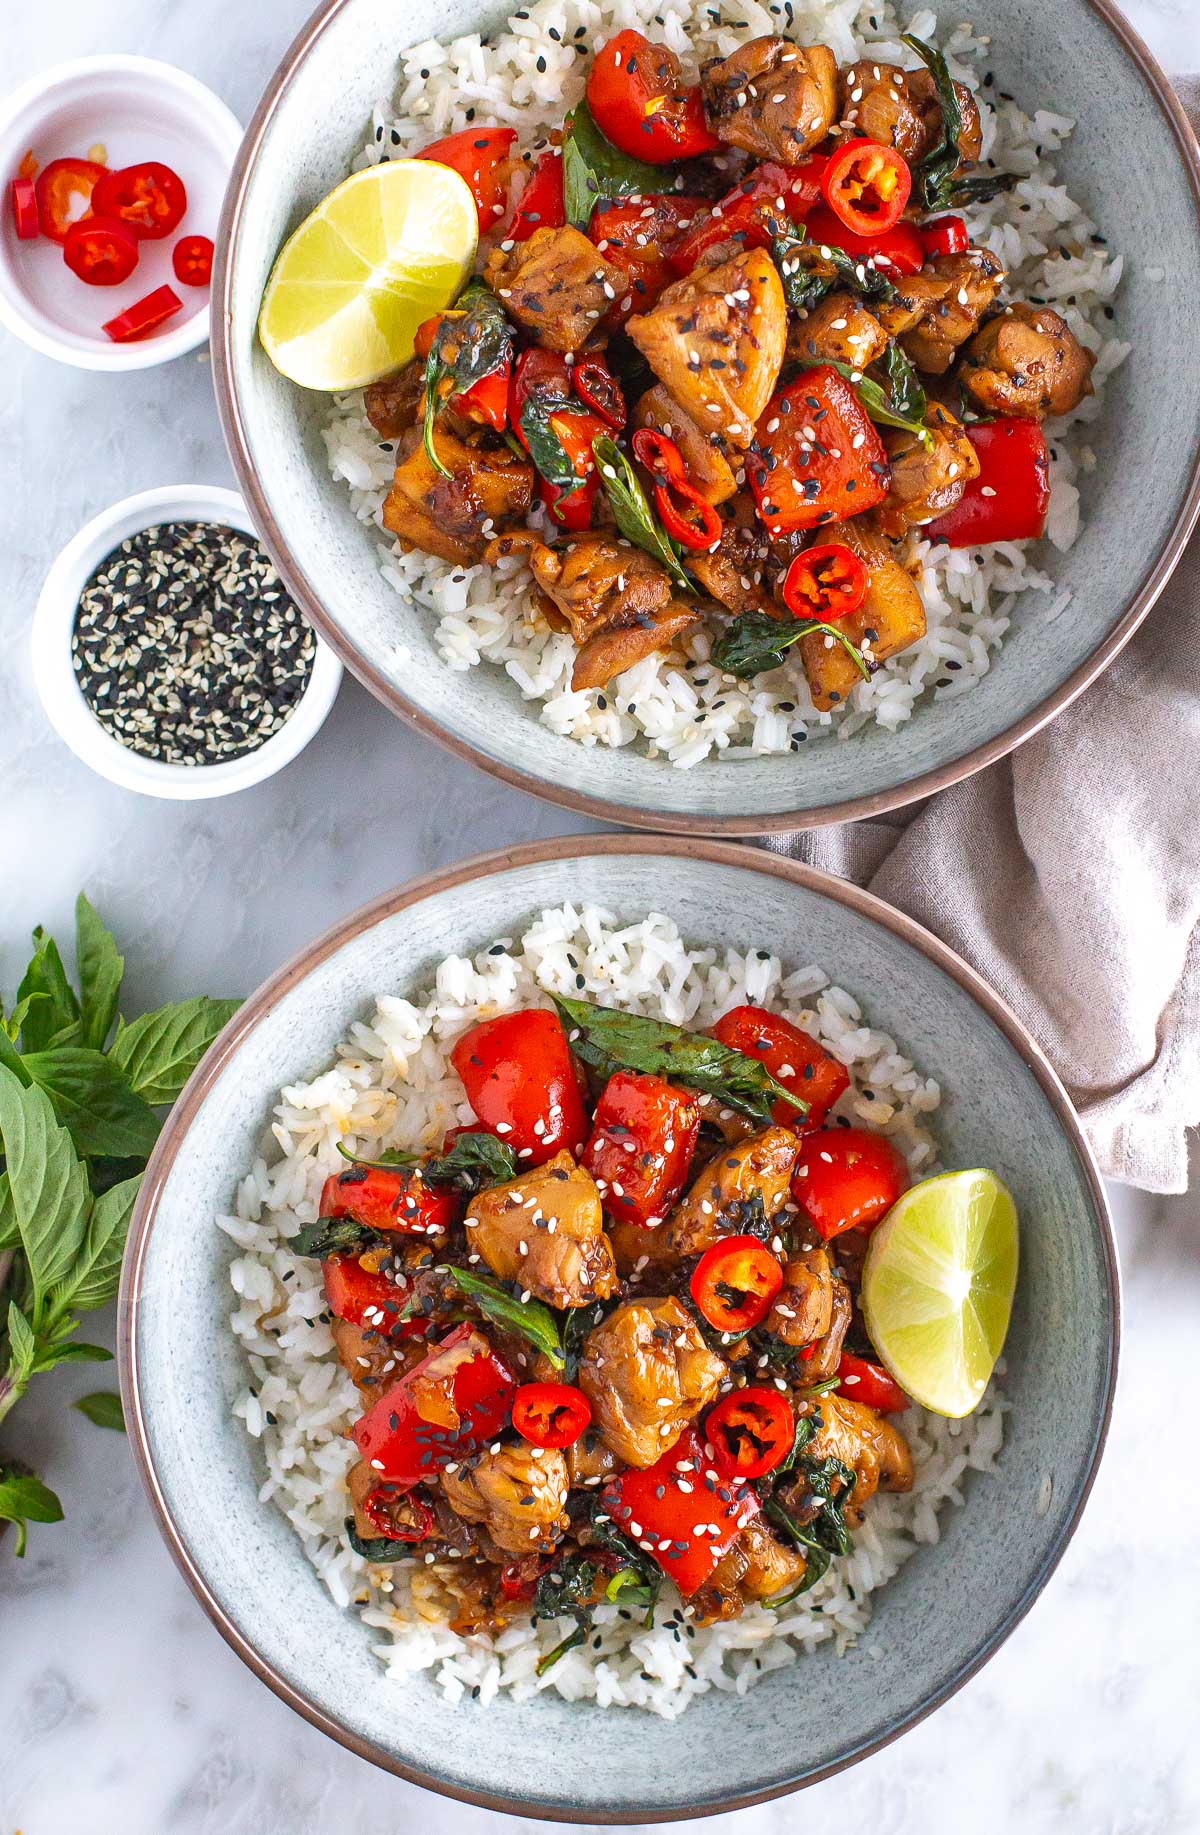
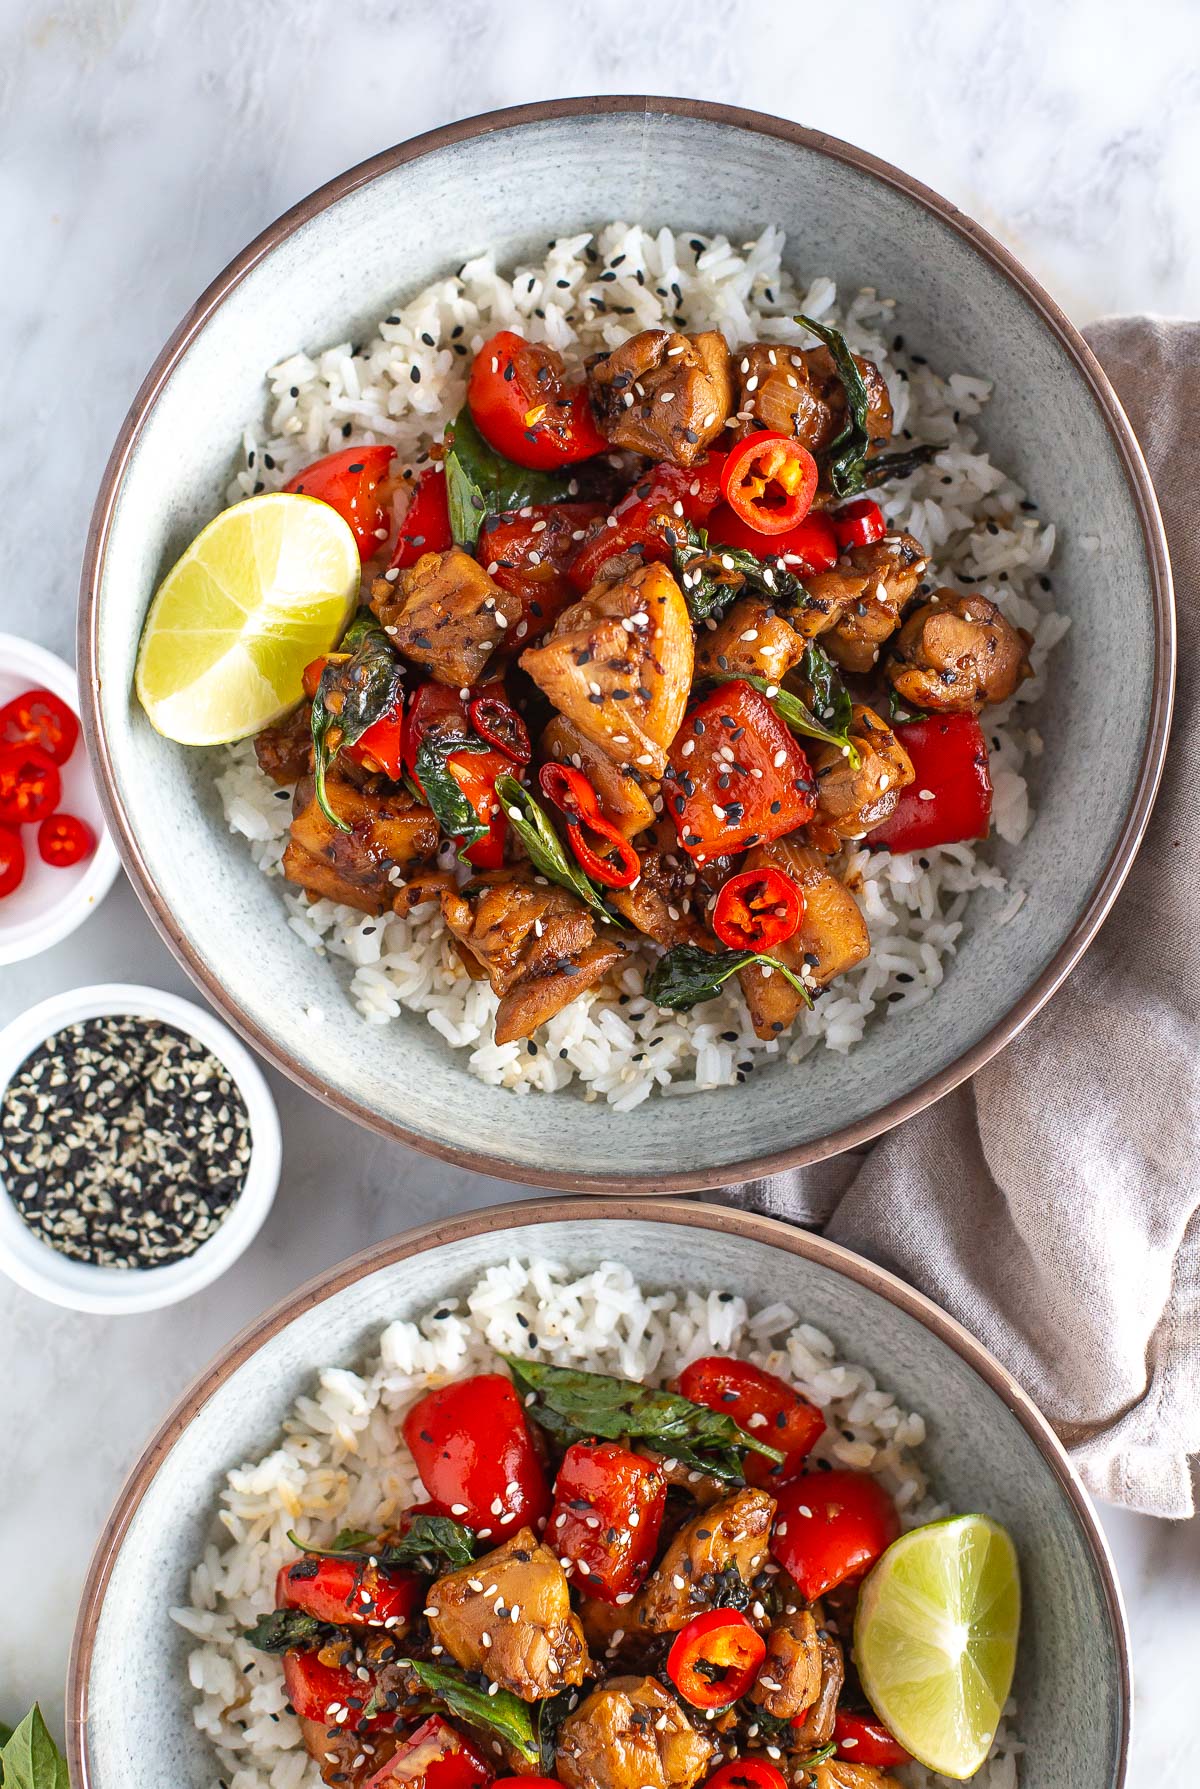
Add the Thai basil then serve with rice and toppings and enjoy!
Thai meal prep variations
There are a few different ways you can customize this dish:
- Protein: Swap out the chicken thighs for chicken breasts, ground chicken, ground turkey, shrimp or even tofu.
- Spice level: For a spicier taste, use Thai chilies in addition to the red chili peppers. For a milder flavor, leave out the red chili peppers entirely.
- Veggies: Add in some diced bell peppers, green beans, bok choy, spinach, zucchini, bamboo shoots, mushrooms, water chestnut and more!
- Toppings: I like to garnish this Thai basil chicken stir fry with sesame seeds and lime wedges, but you could also garnish with green onions or top with a fried egg.
- Sides: Serve this Thai basil chicken with any rice variety of your choice. It would also be delicious with cauliflower rice for a low-carb option.
Frequently asked questions
Is this Thai basil chicken spicy?
This recipe is definitely a bit spicy thanks to the red chili pepper. If you can’t find red chili pepper, you can use some minced jalapeno pepper instead for a bit of kick. Don’t like spice? Leave this out altogether.
What does Thai basil chicken taste like?
Thai basil is used in a lot of Asian dishes, especially in Southeast Asia. The flavour of fresh Thai basil leaves is a bit peppery; a lot like black licorice or anise, but the longer it cooks, the sweeter the taste becomes.
Can you use regular basil instead?
If you aren’t able to find fresh Thai basil at the grocery store, check your local Asian market for it. Using regular sweet basil as a substitute is possible, but the flavour will be less intense and much sweeter than with Thai basil. You may want to add more to enhance the flavour.
Storing and reheating
Storing: Store leftovers or meal prep portions in airtight containers in the fridge for up to 4-5 days.
Reheating: Sprinkle a little water on top and microwave for 1–2 minutes so the chicken and rice stay moist.
Freezing: The full dish doesn’t freeze well, but you can freeze the cooked rice for up to 3 months.
Defrosting and reheating: Defrost the rice in the fridge overnight and reheat in the microwave.
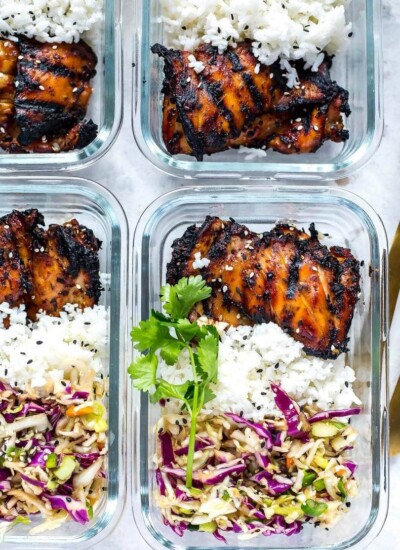
More chicken meal prep bowls


Easy Thai Basil Chicken Recipe
Ingredients
- 1 cup uncooked white rice
- 2 cups water
- 1 tsp butter
- 1 tbsp olive oil
- 8 boneless skinless chicken thighs, diced into 1-inch pieces (about 1.5 lbs)
- 3 shallots or 1 medium-sized onion, diced
- 1 red chili pepper, de-seeded and finely diced
- 1 pinch salt
- 1 red pepper, diced
- 2 cups Thai or regular basil
- Sesame seeds & lime wedges for garnish (optional)
Sauce
- 4 tbsp low sodium soy sauce
- 4 cloves garlic minced
- 2 tbsp oyster sauce
- 2 tbsp brown sugar
Instructions
- Mix all sauce ingredients together in a small bowl and set aside. Meanwhile, get rice, water and butter cooking in a rice cooker while making the rest of the recipe.
- Heat olive oil in a large skillet over medium-high heat. Add chicken, shallots (or onion), chili pepper and a pinch of salt, sauteeing for 4-5 minutes until chicken is lightly browned. Add red pepper and cook another 2 minutes until peppers are tender.
- Add sauce and saute for 2 minutes until chicken is completely heated through. Turn off heat and stir in basil leaves.
- Serve by spooning chicken mixture and sauce over cooked rice, then garnish with sesame seeds and lime wedges if desired. Serve and enjoy!
Video


Comments & Reviews
Angela says
Hi, I love this recipe! On your site there used to be a version with cabbage, carrots, & ground chicken. Is that recipe still available?
Taylor Stinson says
Hi Angela – I’m so sorry but that recipe was deleted a while ago and is unretrievable. I will keep your request in mind though as I develop future recipes and will hopefully put a similar recipe back up on the site!