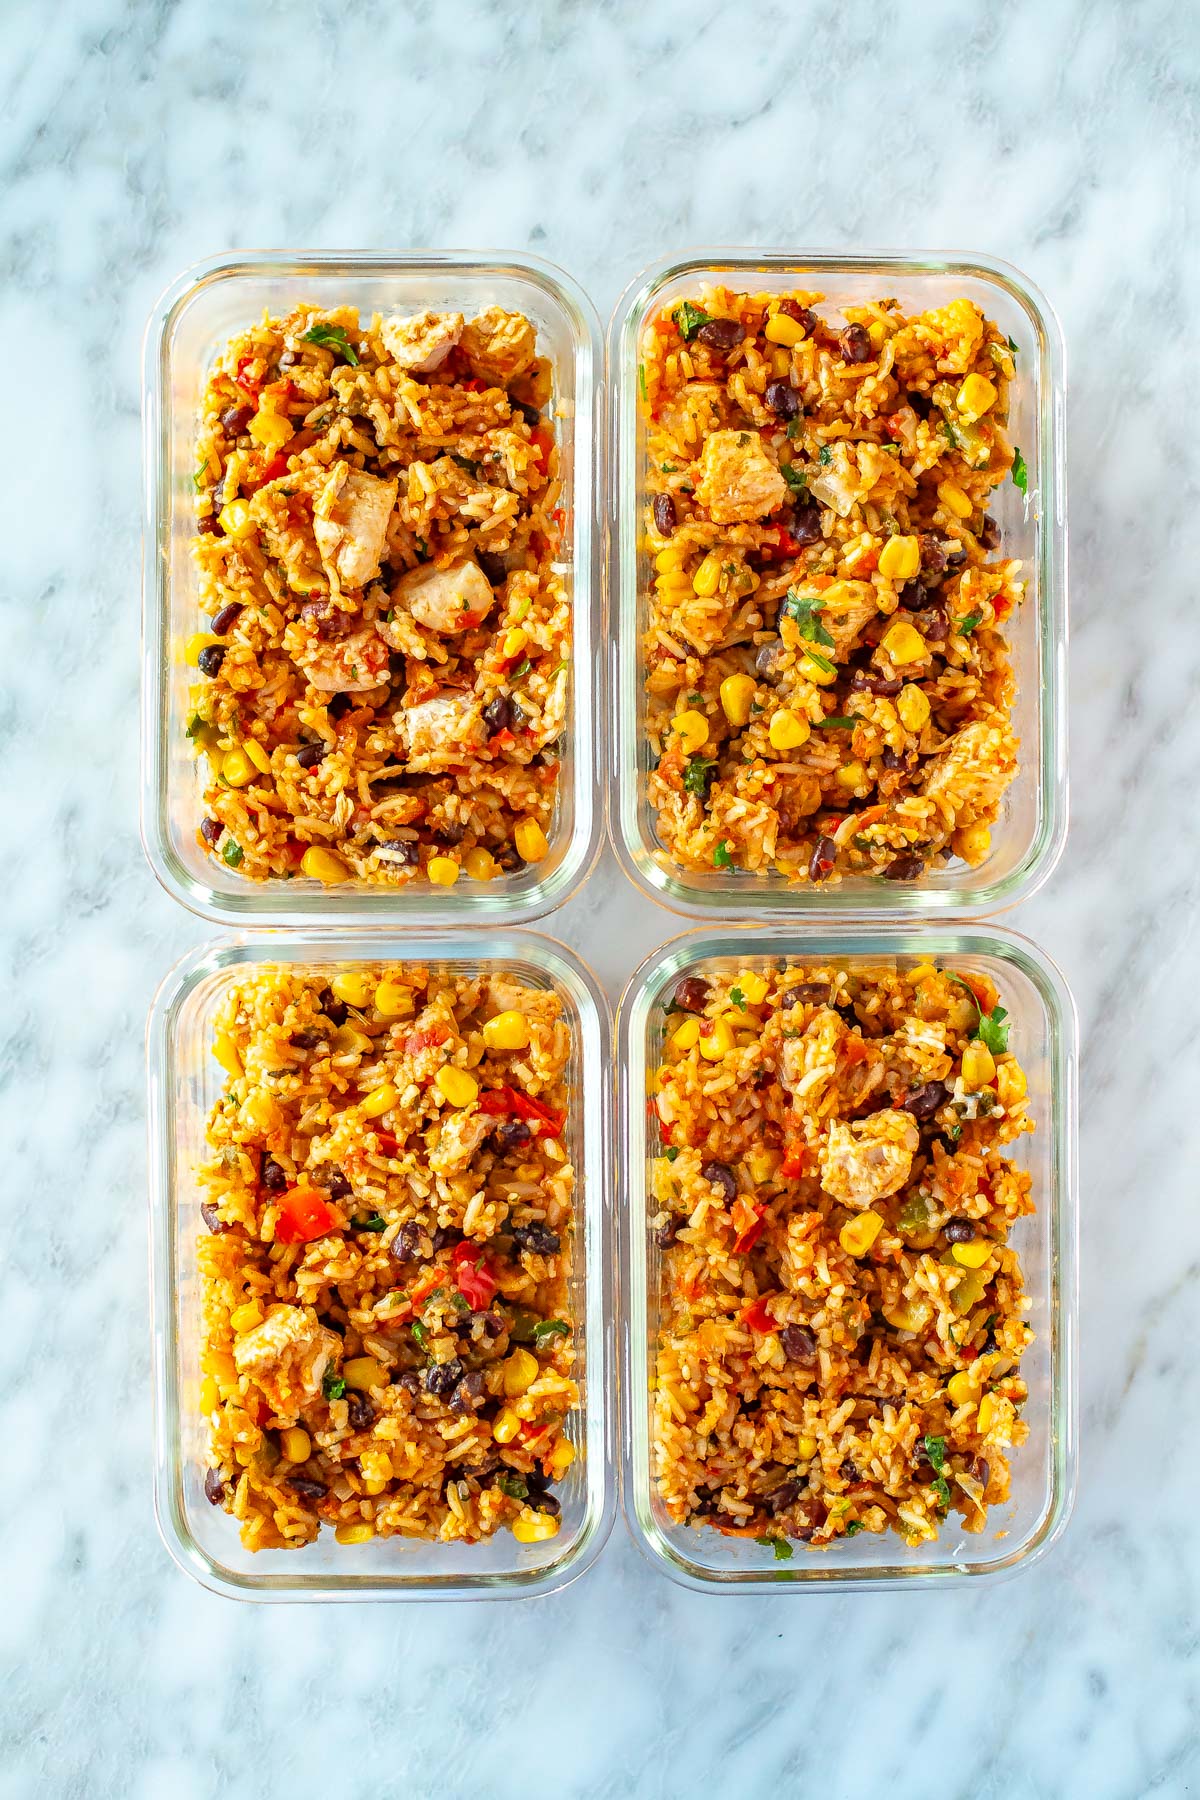
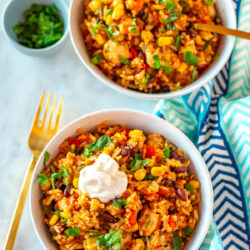
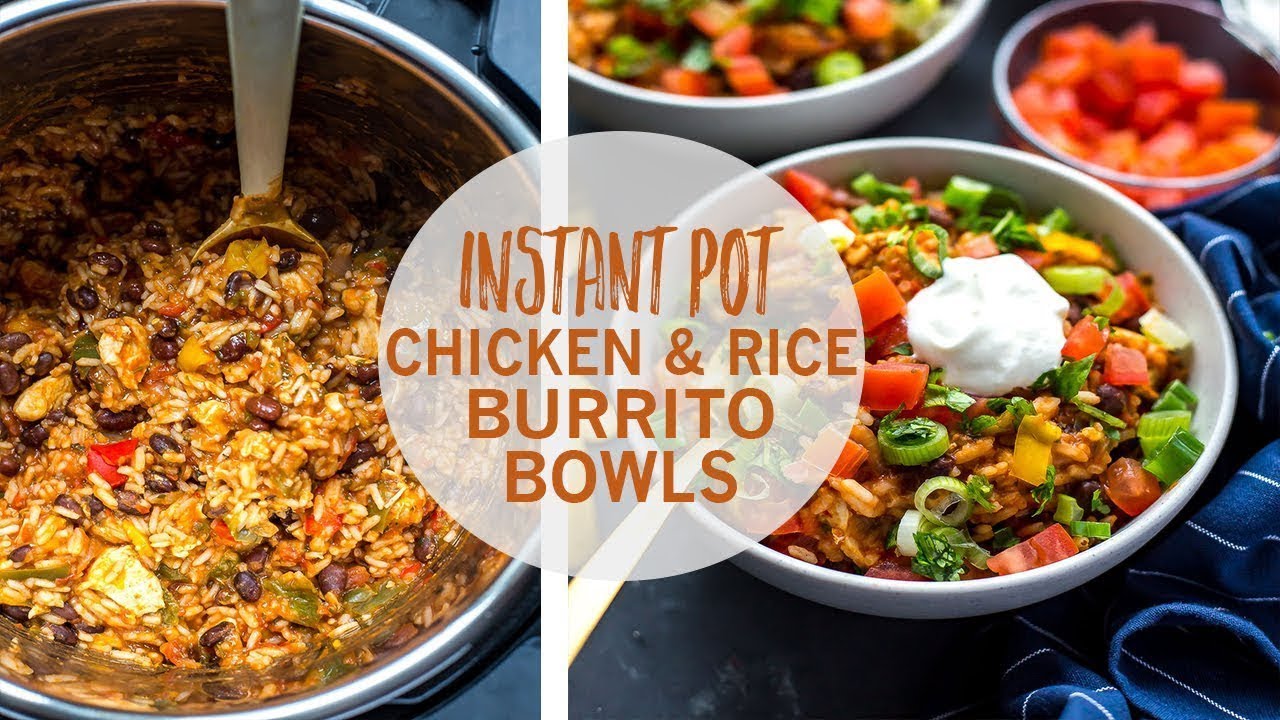
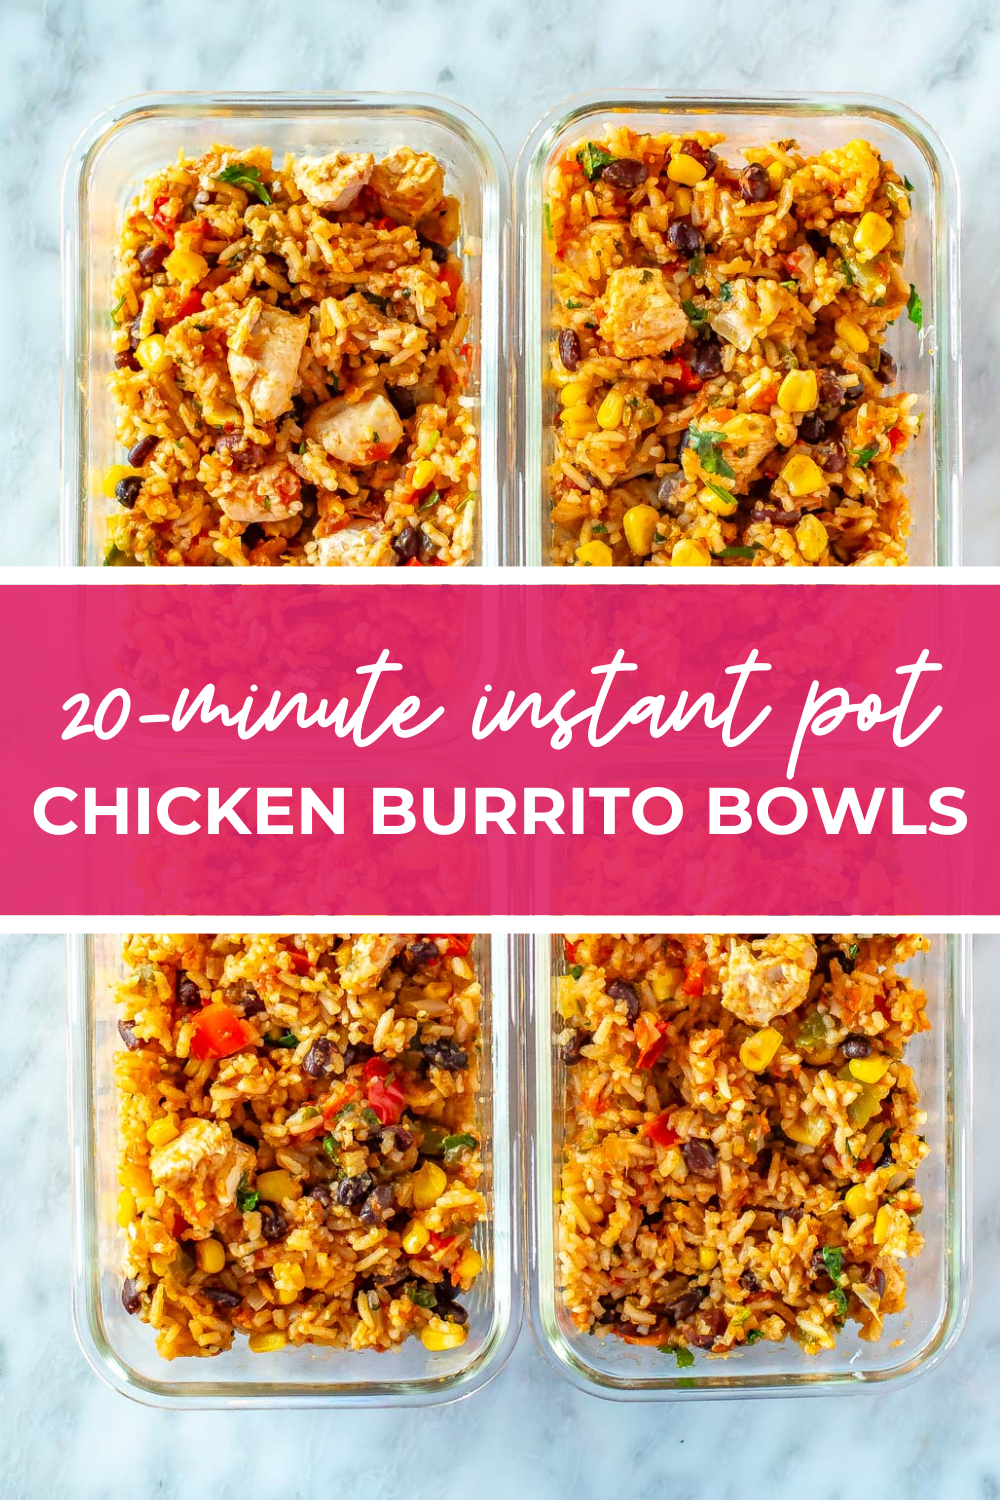
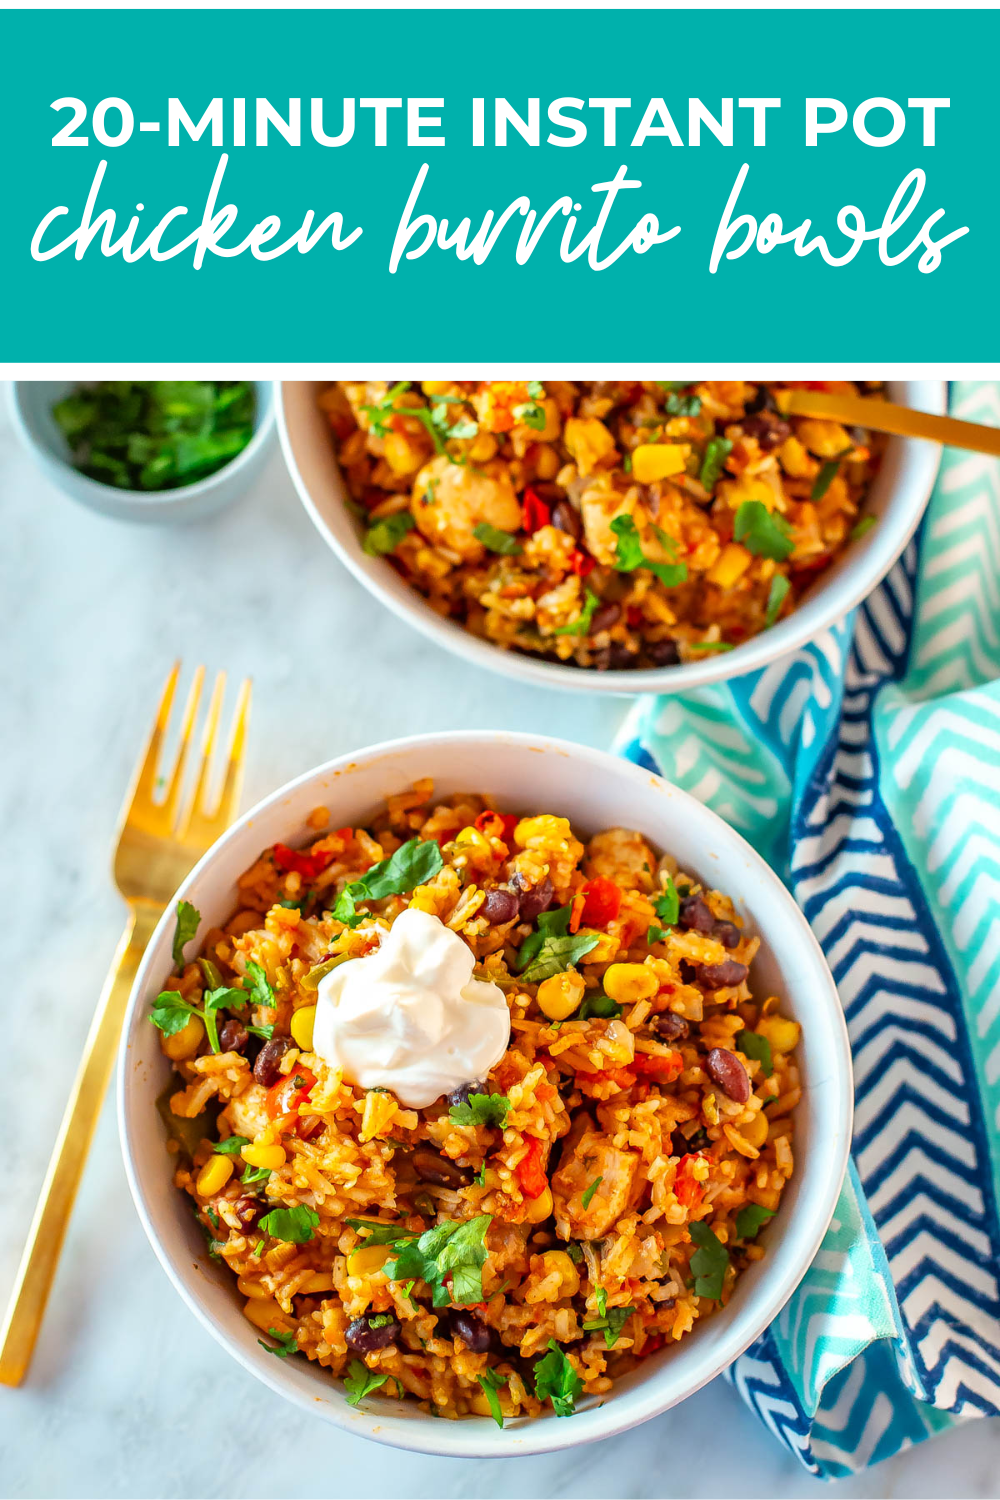
These 20-Minute Instant Pot Chicken Burrito Bowls are a healthy, easy and flavourful dinner idea made with simple ingredients!
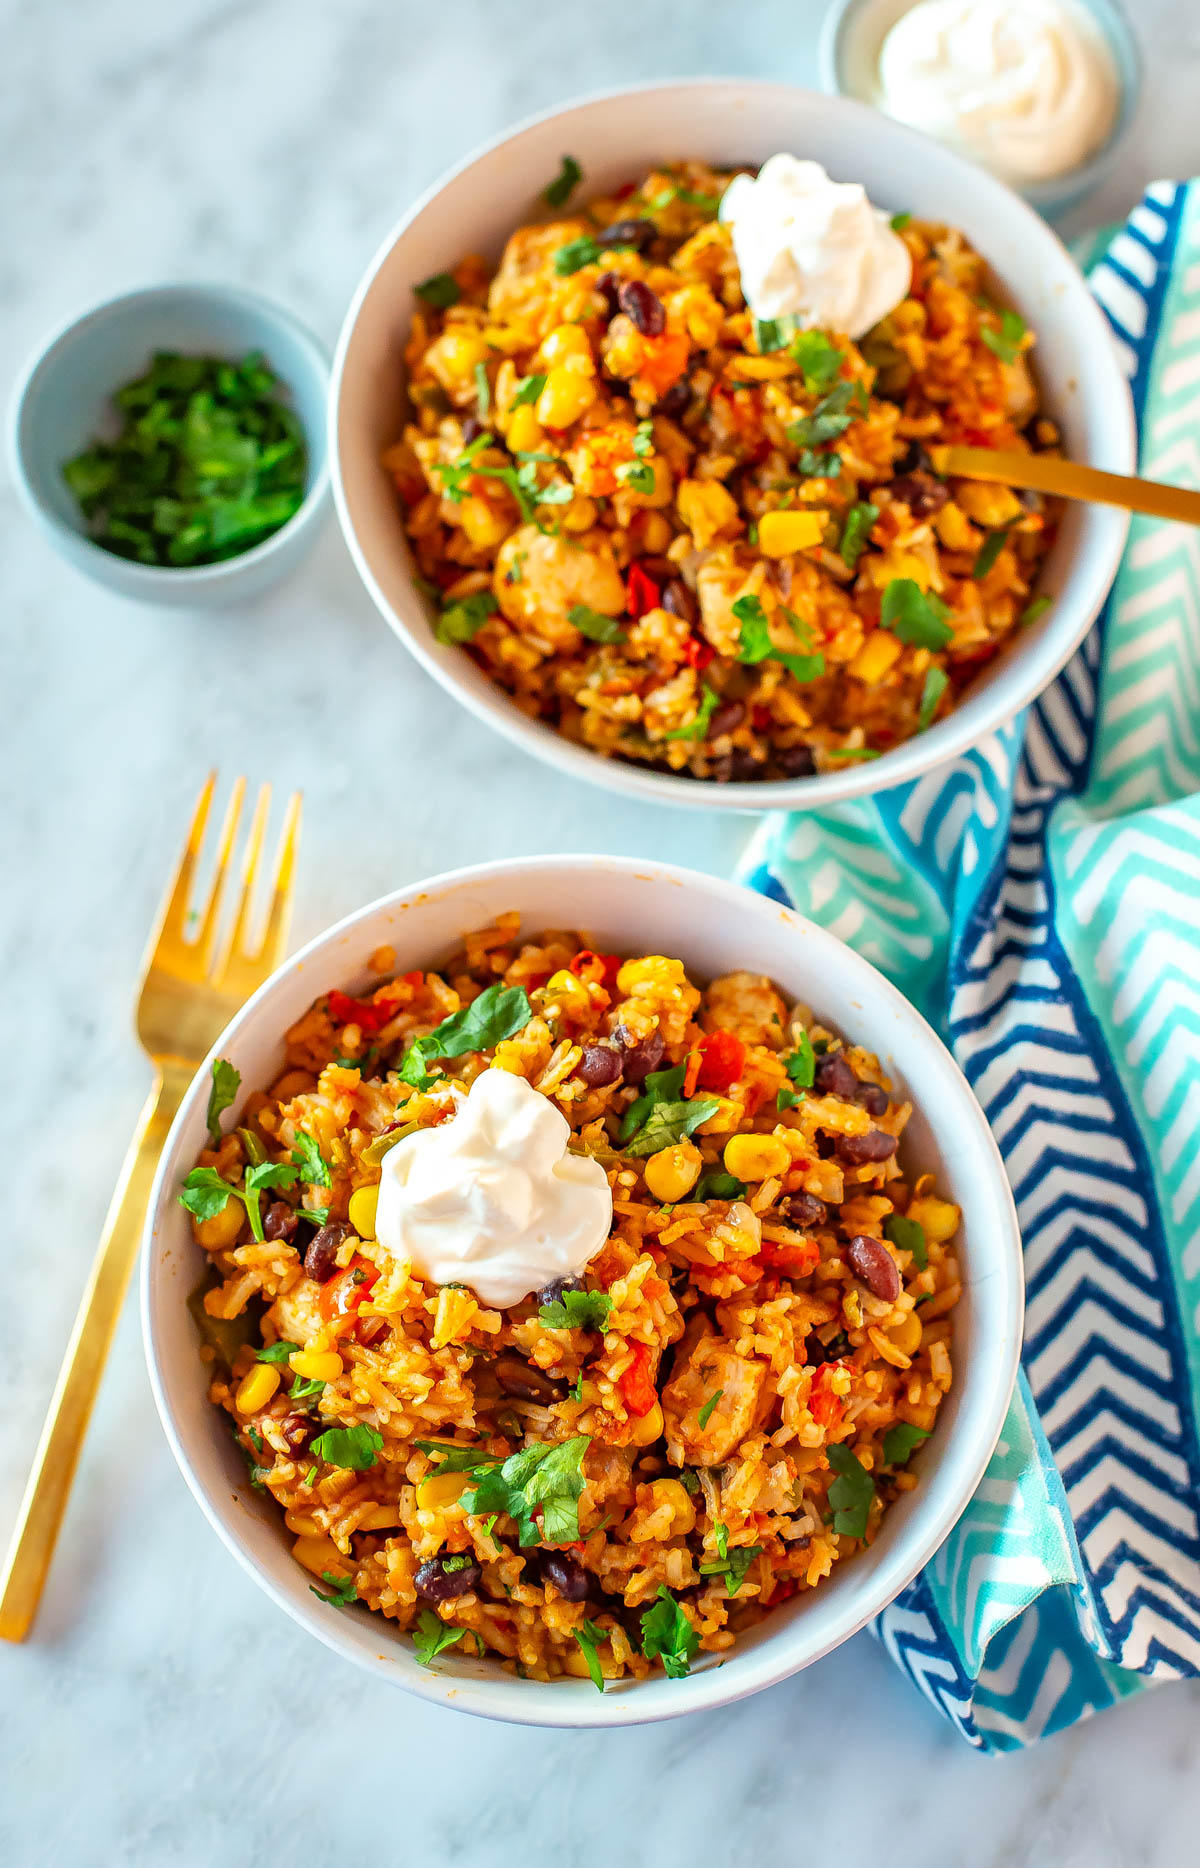
Move over, Chipotle! I love making these burrito bowls in the Instant Pot – they’re easier than you think.
Why you’ll love this recipe
- Quick and easy meal: Everything comes together in 20 minutes, and is made in just one pot.
- Customizable: Add on your favourite toppings or swap out the ingredients for different diets.

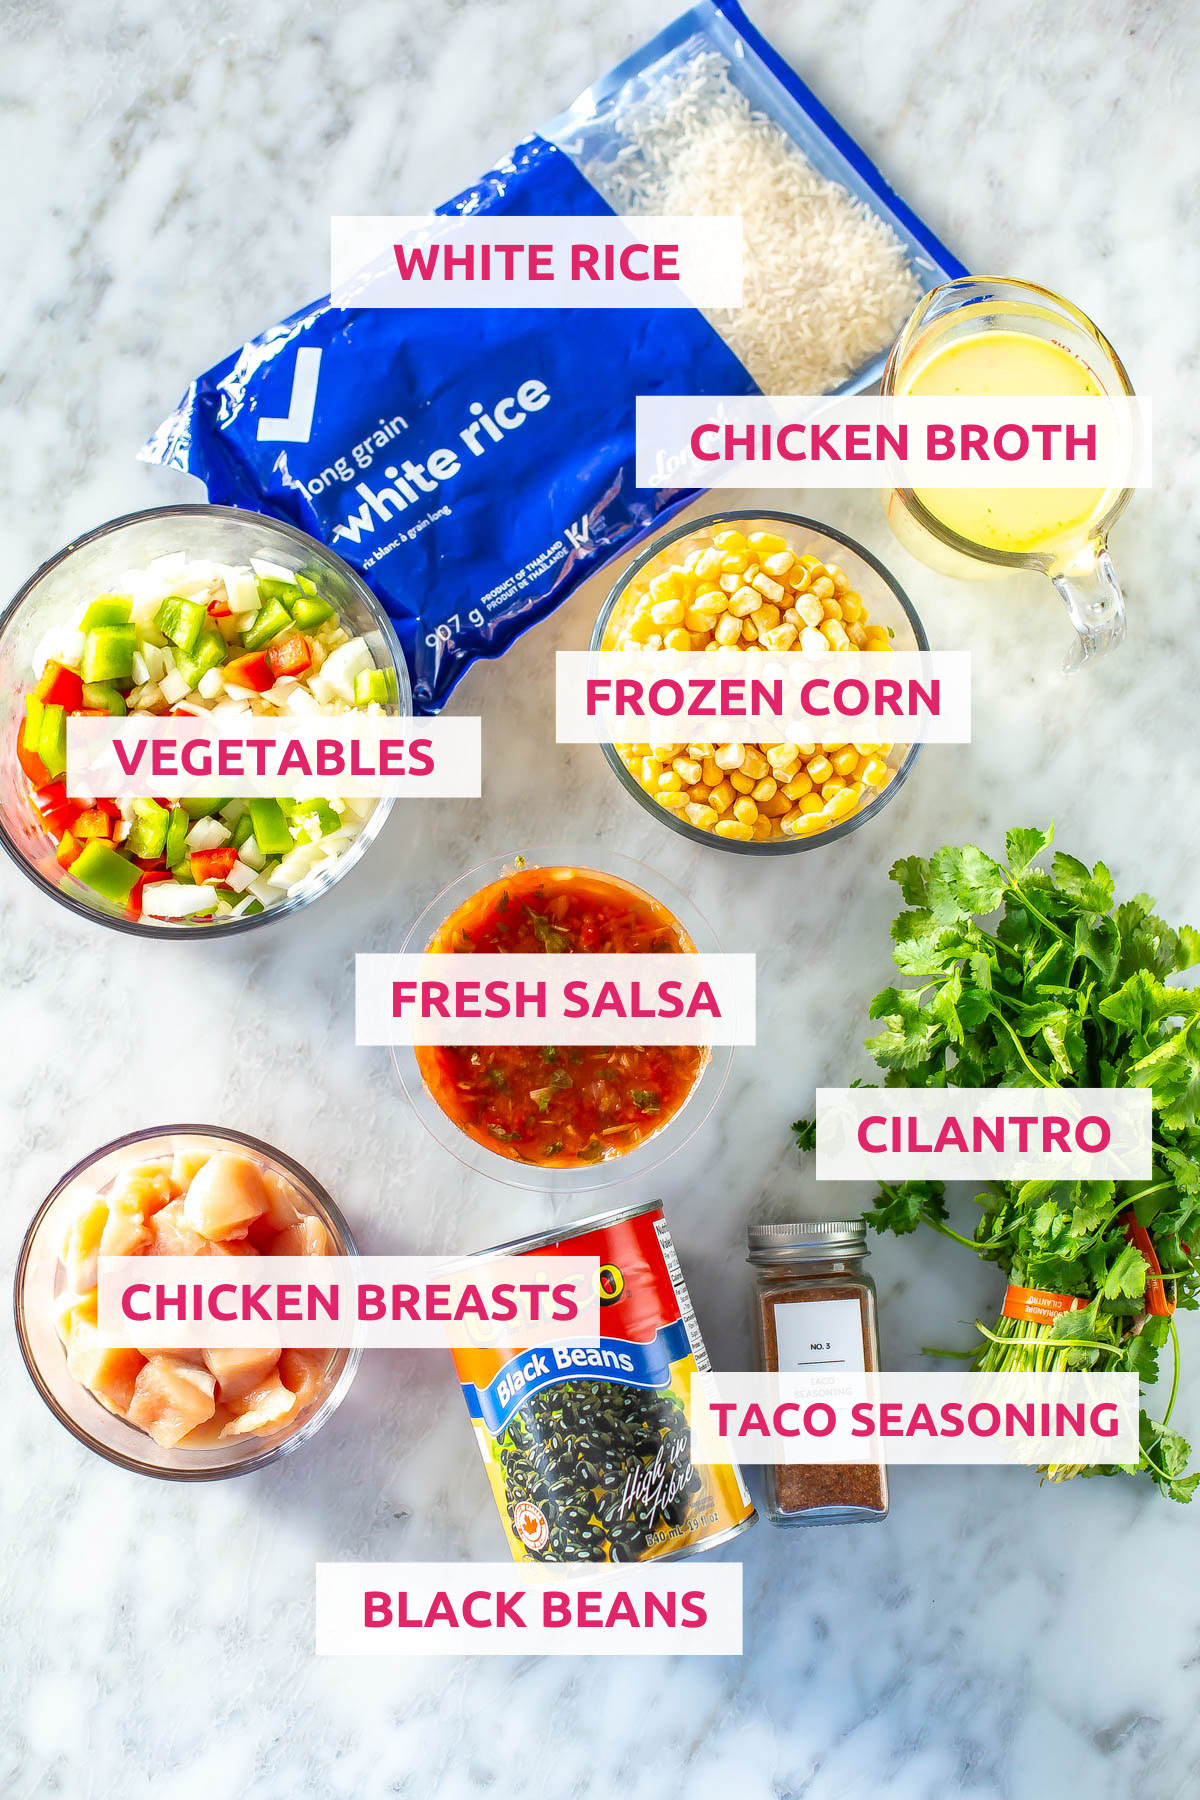
Ingredients and substitutions
- Olive oil – or another neutral cooking oil like avocado or canola oil.
- Chicken breasts – ground beef or turkey will work, but you’ll need to brown it first.
- Taco seasoning – make your own taco seasoning.
- Yellow onion – white or red onion would also be good here.
- Garlic – use freshly minced or jarred minced garlic.
- Red and green pepper – you could also use yellow or orange bell peppers.
- Fresh salsa – jarred salsa or canned crushed tomatoes would work.
- Black beans – use brown or green lentils, chickpeas or kidney beans instead.
- Frozen corn – or any frozen vegetable blend of your choice.
- Chicken broth – vegetable broth is the best substitute here.
- White rice – you can use jasmine rice instead.
How to make burrito bowls

Step 1: Add everything to the Instant Pot.
Add all the ingredients and gently stir the rice into the liquid.
Step 2: Cook on high pressure.
Cook on high pressure, then do a quick pressure release.
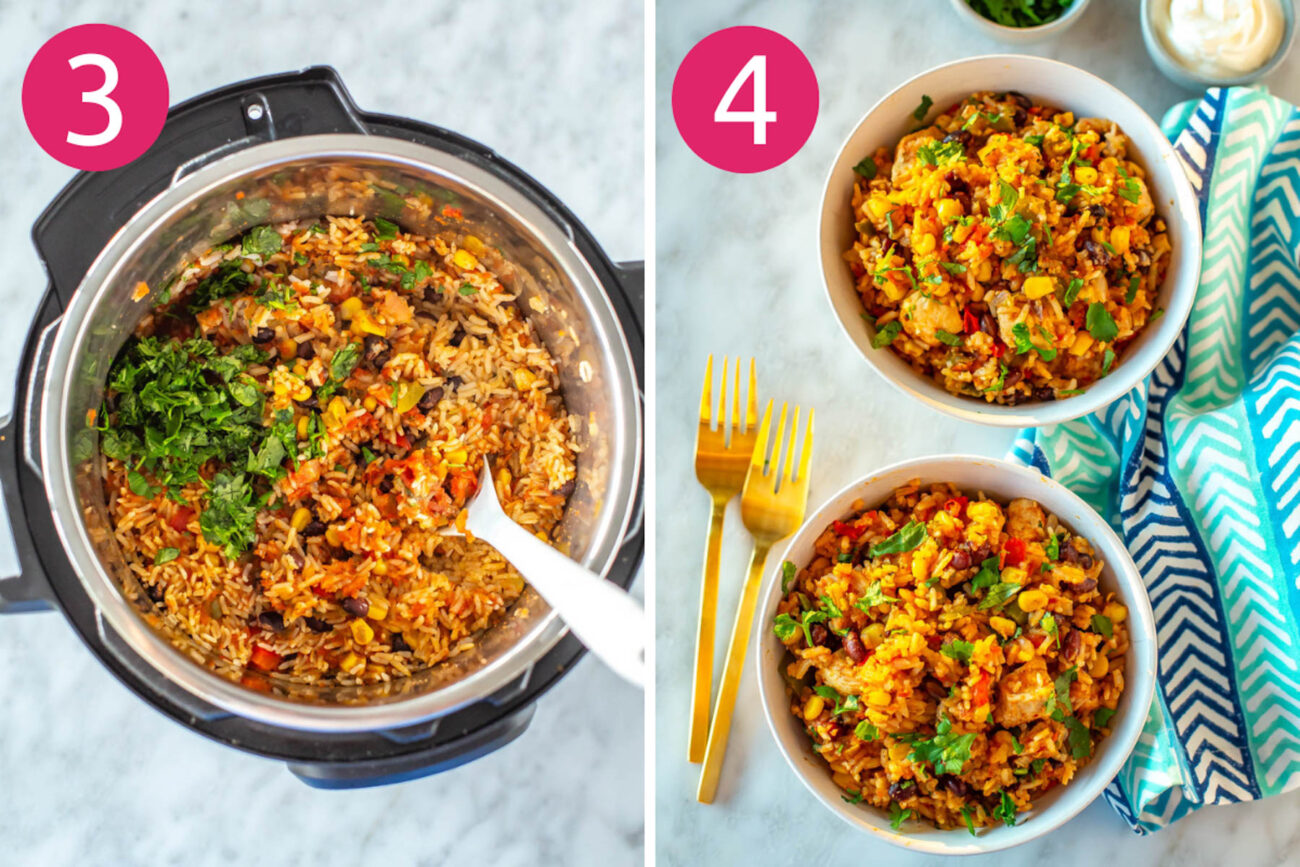
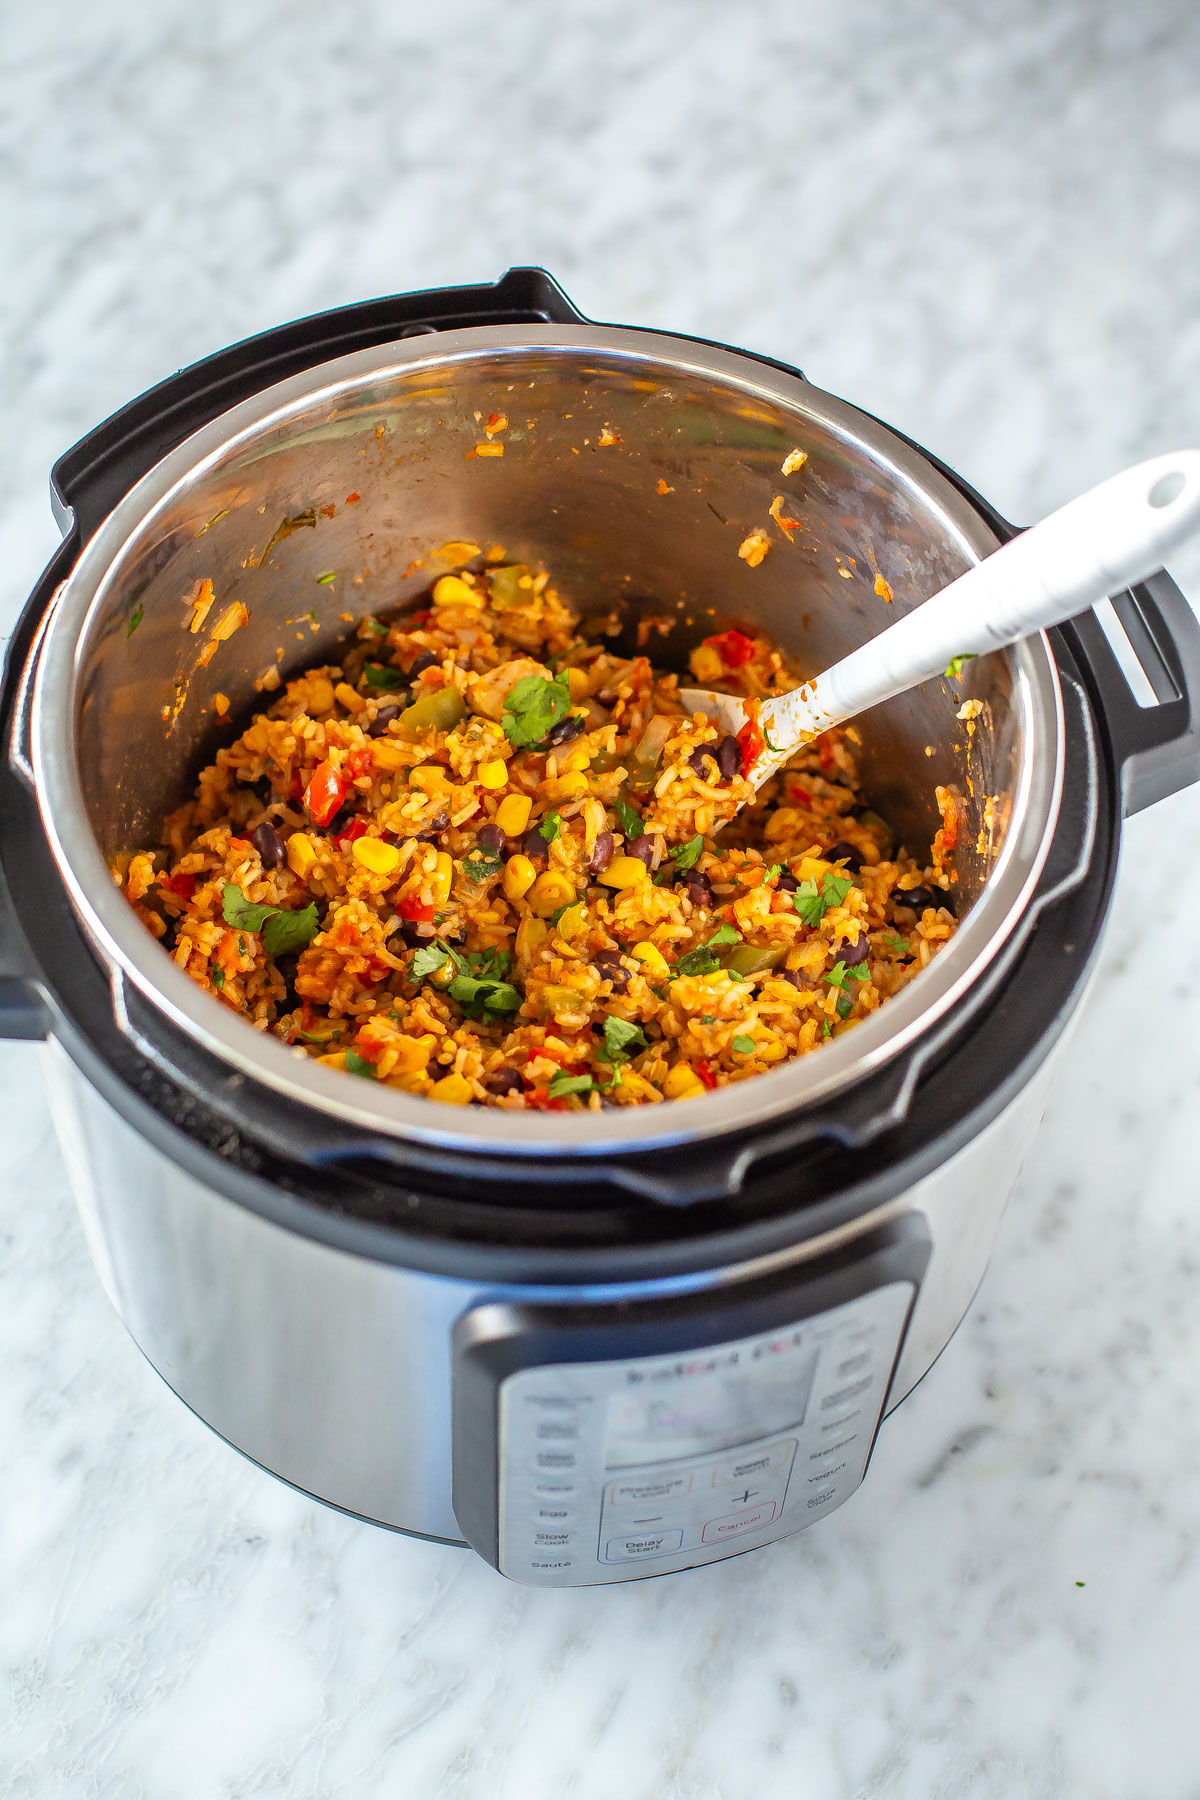
Step 3: Add the cilantro.
Drop in the cilantro and give the mixture a good stir.
Step 4: Add your toppings.
Serve with any toppings of your choice.
Recipe variations
- Make it vegetarian: Use vegetable broth, skip the chicken and add more black beans or kidney beans.
- Try ground beef or turkey: Brown the ground meat on the sauté function, then drain any excess fat and add in the remaining ingredients.
- Add some spice: Stir in some de-seeded jalapeños for a bit of a kick.
- Top with more flavour: Try my super easy 4-ingredient guacamole.
Frequently asked questions
Can I use brown rice instead of white rice?
Since brown rice requires a longer cooking time, you might end up overcooking the chicken. It’s best to use long-grain white rice like jasmine or basmati.
Are these chicken burritos healthy?
Definitely. This recipe includes lean protein and whole ingredients. It’s high in fibre and doesn’t have any processed foods! Your body will thank you for this one.
Can I make these burrito bowls in the slow cooker?
Yes! Spray the slow cooker with cooking spray, dump everything in the crockpot and cook on high for 4 hours or low for 8 hours, stirring once or twice throughout the cooking time.

What to serve with this dish
- Toppings: Salsa, pico de gallo, guacamole, shredded cheese, sour cream, refried beans and lettuce would all be delicious.
- Sides: Serve with tortilla chips and cowboy caviar, or salsa and guac.
- Burritos: Wrap the filling up in a tortilla and serve it as a burrito!
How to store and reheat
Make-ahead: Prep all ingredients in the Instant Pot, cover, and refrigerate for up to 24 hours before cooking.
Store: Keep leftovers in an airtight container in the fridge for up to 4 days.
Reheat: Microwave for 1-2 minutes, stirring halfway, or warm on the stovetop over medium heat with a splash of broth.
Freeze & reheat from frozen: Freeze in a freezer-safe container for up to 3 months. Thaw overnight in the fridge, then reheat on the stovetop or in the microwave.
More easy Instant Pot recipes
Meal prep tools
- The Instant Pot DUO Plus is the version I use in this recipe.
- Grab some glass meal prep bowls if you plan on packing this dish up for leftovers.
- These aluminum foil containers are perfect for re-heating straight from the freezer to oven.
- And of course I get all my free range chicken breasts from Butcher Box!

Instant Pot Chicken Burrito Bowls
Ingredients
- 1 tbsp olive oil
- 1 lb chicken breasts diced into 1-inch cubes
- 1 tbsp taco seasoning
- 1 yellow onion diced
- 4 cloves garlic minced
- 1/2 each red and green pepper diced
- 2 cups fresh salsa (I used the fresh kind, Garden Fresh Gourmet, found in the refrigerated section of the grocery store but you can use jarred)
- 1 can black beans drained and rinsed
- 2 cups frozen corn
- 1 cup chicken broth
- 1 cup white rice
Optional toppings
- Cilantro
- Sour cream
- Cheese
- Jalapenos
Instructions
- Dump all ingredients in the order in which they are listed (except for toppings) in Instant Pot. Ensure you add rice on top of everything else and gently stir it in to the liquids on the very top. Do NOT stir the entire mixture way down to the bottom, you just want to ensure the rice is covered by liquid. If you stir the entire mixture, you may get the burn message.
- Set to manual and pressure cook on high for 4 minutes. Instant Pot will take about 10 minutes to pre-heat and then the 4 minutes to cook.
- When complete, press cancel and do a quick release of the steam, waiting until the pressure gauge drops back down and the lid is safe to open.
- Remove lid, stir contents well and divide among 6 bowls. Top with any toppings of choice then serve and enjoy!
Video
Comments & Reviews
Lynn says
What adjustments would I need to make if I used brown rice?
Taylor Stinson says
Hi Lynn! Unfortunately I haven’t tried brown rice so I really couldn’t tell you. You could always try it yourself (I don’t envision you would need to change the liquid ratios) and see how it goes if you don’t have jasmine rice on hand!
Sukaneya says
Doesn’t rice need to be immersed in liquid in order to cook? If I add the rice at the end on top of the veggies, salsa and tomatoes, how would it cook? When I use the Instant pot as a rice cooker I always put the rice immersed in the water and it cooks perfectly. I haven’t had issues of the rice burning or sticking to the bottom.
So I tried this recipe once several weeks ago. I dumped all the ingredients in the pot as instructed, but also stirred it before sealing it and it burned. The rice didn’t cook and I had to finish it on the stove top. I talked to a few people and I was told it’s probably a result of adding the liquid at the end. Pressure cookers need a base of liquid at the bottom of the pot to cook the food properly. So today, I made it again (I admit, I didn’t read the comments before doing so). This time, I made sure to add the liquid at the bottom, followed by the rice (as I would normally do when making plain rice) and then topped it with the veggies, seasoning, salsa and crushed tomatoes. And again it got burned and I had to finish on the stove top. I just read the previous comments and notice that the burn is a result of putting the rice at the bottom. I don’t know how the rice would cook if it’s not immersed in the liquid at the bottom? Can you please tell me what I could be doing wrong?
Taylor Stinson says
Hi Sukaneya! I updated this recipe based on one of the comments a couple of weeks ago to more specifically instruct people to add the rice in last after all the other ingredients – I also show myself putting the rice in last in the video. The Instant Pot is not like a rice cooker – everything gets pressure cooked together so while I can’t exactly explain the science behind it, the rice does get cooked by being on top of everything else, and then you can avoid it getting burned. If you’re unsure of exactly what to do, it’s helpful to follow the recipe exactly as listed the first couple of times or so until you can get a feel for it. I do say to add the rice last in the instructions of this recipe and I’ve tried it a few times this way and it always turns out perfectly for me – sorry to hear you’ve had such trouble with this, I know the Instant Pot takes a bit of getting used to!
Sharn says
Would you change anything if you were not going to add any chicken
Looking for a vegetarian option to substitute the meat
Taylor Stinson says
Hi Sharn! I’m honestly not sure of the liquid to rice ratios if you were to leave the chicken out since I haven’t tested it this way myself. You could try it and see what happens – I think it would be fine to leave out the chicken!
Rebecca Nielsen says
I have a 6 qt instant pot. Would there be enough room for me to double this recipe? (I’d like to have leftovers, and I also don’t have 1 cup cans of crushed tomatoes or chicken broth, so doubling it would mean no waste of the remaining portions of the cans.)
Taylor Stinson says
Hey Rebecca… I haven’t tested it and honestly I would not advise for you to double it. I have the six quart as well and it’s pretty full already. Sorry about that!
Tony Faillo says
Hello … very tasty recipe and so easy! One lesson I learned (and if I reviewed your video again before making this, I would have done things differently) …. I added the uncooked rice in first then the rest of the ingredients after … I did give it a stir then popped the lid on and went! ERROR … the rice that was still on the bottom burned and the pot wouldn’t proceed. Ended up moving it to a pot on the stove with a lid and finished it off. Always the uncooked rice on the top!!! LESSON LEARNED and will make it again
Taylor Stinson says
Hey Tony! SO sorry for the delay, I don’t know how I missed this comment! I’m very sorry your rice burned on the bottom, thanks so much for your feedback! I’m a bit new to posting recipes with the Instant Pot – I know instinctively based on some recipe testing not to put grains like quinoa or rice on the bottom, but have clearly forgotten to articulate this to others. You’ve really taught me a lesson in terms of more clearly listing instructions step by step so that others don’t have this issue. I know everyone is still getting used to the Instant Pot and we definitely want to prevent as many errors as possible, and that’s on me to more properly communicate. I appreciate your patience and willingness to share this with me! I have modified the recipe instructions, and I’m so glad that despite the burned rice the first time, you ended up loving the recipe in the end! 🙂 Thank you again for sharing this with me and again I’m sorry for the trouble!!!
Devi says
i stirred it all up, and the rice did not cook. Had to cook it again. Otherwise really tasty. would likely skip the rice all together next time. thanks for the recipe!
Vanessa says
Made this a couple nights ago and it was so yummy! It stuck a bit to the bottom of the pot but otherwise perfect. Next time though I’m going to swap out the cup of tomatoes for two cups mild salsa instead! We garnished it wish some avocado too.
Sukaneya Moorthy says
Sorry for the almost duplicate post ..i added a Q about cous cous
Sukaneya Moorthy says
What if I want to reduce the rice to half a cup?…would I also reduce the chicken broth to 1/2 vup?…how does it change the cook time or quantity of the liquidy salsa and beans?
Taylor Stinson says
Hey Sukaneya! I can’t recommend reducing the rice because I haven’t tested this myself – I can only vouch for the ratio of ingredients as listed. Sorry about that!
Sukaneya Moorthy says
Ok…I’m just trying to reduce the carbs…thanks for the quick reply!
Sukaneya Moorthy says
Ok…I’m just trying to reduce the carbs…do you think cous cous might work instead if rice?. Thanks for the quick reply!
Taylor Stinson says
Hey again! 🙂 I’m really sorry but I just can’t guarantee it if I haven’t tested it! I can only really tell you how this recipe will turn out if you follow it exactly as listed. I can’t properly predict how any substitution/modification will turn out. If you would like to limit the carbs, you could try leaving the rice out altogether and cutting all the liquids in half (salsa, tomato sauce, broth, etc). I would leave the peppers out and stir them in towards the end and leave them sit for 5 minutes in with the sauce and chicken though. And again, because I haven’t tested this myself I can’t guarantee how it will turn out, but based on my knowledge of cooking and how the Instant Pot works this would probably be the best bet for a lower carb dish. From there, you could prepare the couscous or rice separately and just add in as much as you would like, whether you portion it out separately or stir it in. Let me know how it turns out if you try it that way!
Deb says
Thank you for asking this question because I was wondering the same as reading through the comments. I also want lower carbs
Deanna says
This feels like a stupid question, but I’m new to the Instant Pot (and not much of a cook overall) – is the chicken cooked before you add it? I’m excited to try this and don’t want to ruin it from the get go! Thank you!
Taylor Stinson says
Hey Deanna! Not silly at all 🙂 I actually forgot to upload the video for this post so you can see for yourself how to make it! You do put the chicken in raw because it gets pressure cooked, it cooks super fast especially when it is cut up into chunks. You also put the rice in uncooked. With all the liquids it gets cooked all together. Hope that helps!
Janine says
This looks great! If I didn’t add the rice and beans, how long would I cook it? 10-15 minutes? Thank you 🙂
Taylor Stinson says
Hey Janine – unfortunately I don’t know exactly because I only tested the recipe with rice and beans, but if I had to guesstimate I would pressure cook on high for 3 minutes, leaving out the bell peppers and stirring them in after with the chicken. That should be enough to cook the chicken through 🙂