Is your freezer messy and overwhelming? Follow these 6 steps to organize your freezer and make finding ingredients and leftovers a breeze.

Why you need to organize your freezer
Ever dig through your freezer and feel totally overwhelmed? We’ve all been there. No matter what type of freezer you have, whether it’s a top freezer, a drawer style or a big chest freezer, keeping it organized makes everyday cooking so much easier.
Here’s why getting your freezer in order is a total game changer:
- Saves time: When everything has a clear spot, you won’t waste time digging around trying to find that frozen chicken or the veggies you were sure you bought.
- Saves money: An organized freezer makes it easy to see what you already have, so you’re not wasting money at the grocery store or letting ingredients get forgotten. I always recommend shopping your freezer first!
- Saves space: If your freezer space is limited, maximizing your storage space is key. Organizing everything by zones or groups will ensure your making the most of what space you do have.
- Reduces food waste: When ingredients are easy to see and reach, you are far more likely to use them before they expire or get freezer burn.

How to Organize Your Freezer

Step 1: Empty Out Your Freezer
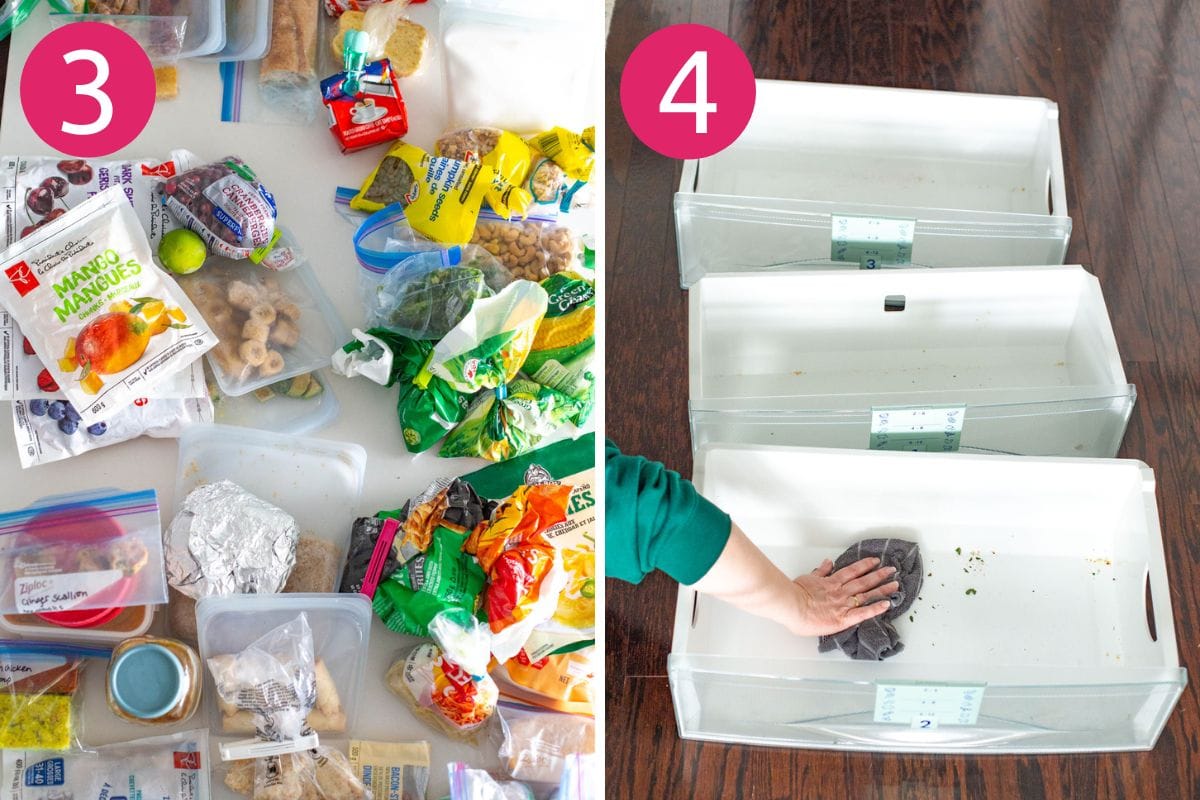
First things first – empty that freezer out! Pull out all the frozen pizzas, ice packs, leftovers, etc. It’s going to get worse before it gets better, and you want to start with a clean slate.
Step 2: Sort and Declutter
Once the freezer is empty and you have all the items on the counter, take a freezer inventory. Throw-out anything that’s expired or got freezer burn, and start to sort through the items.
Step 3: Group Similar Items Together
Start making stacks of items that should be stored together – put all the frozen vegetables together, the sauces together, the protein together, the soups, broth and chili together, etc. This will help determine how many different categories you’ll have, and you can group everything together in freezer baskets or bins.
Step 4: Clean Out Shelves
Your freezer needs to be cleaned just like the rest of your appliances! Before adding everything back into the freezer, you want to give the freezer bins and shelves a good scrub. Rinse them out or wipe them down with some dish soap and water.

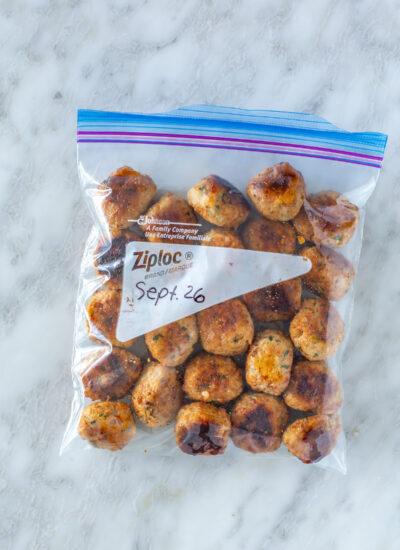
Step 5: Label and Date Items
Use labels to mark down what an item is and its expiration date (i.e., ground beef, expires Jan 2026). You can use a permanent marker for items that go in a freezer bag and labels for glass food storage containers. You’ll want to sort the items in order of date, with oldest at the front and newest at the back, so you’re using things up by their expiration date.
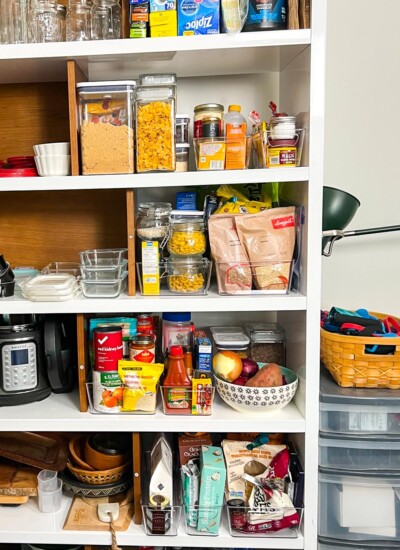
Step 6: Utilize Storage Containers and Bins
For next level freezer storage, I’d recommend investing in storage bins or baskets. It makes it way easier to sort through all your items when you have different use bins, like a bin for protein, a bin for veggies, a bin for grains, and so on. This is especially useful if you have a chest or side-by-side freezer!

Tips for Maintaining an Organized Freezer
Now that you have a beautifully organized freezer, you want to keep it that way! Here are some of my top tips by ensuring your freezer stays as organized as possible:
- Organize by date: Keep the oldest food at the front of the freezer, and the newest food at the back. Every time you freeze something, add it to the back of the stack or bin to ensure you’re using everything up while it’s still fresh.
- Store items upright: This mostly works for items you’re storing in Ziploc bags, but if possible, freeze the food flat then stack the bags upright. They’re way easier to sort if they’re upright than if they’re layered on top of each other.
- Keep an inventory: You can always save all the items you’ve frozen in the Notes app of your phone. This makes it even easier when you’re doing your meal prep and grocery list for the week, because you can just pull up your phone vs. having to rifle through the freezer.
- Stay within the zones: Once you’ve gone to all the work of grouping items together by zone, you want to keep up with that system. Don’t just throw an item in the freezer – make sure you’re taking the extra few seconds to store it with similar items.

Frequently asked questions
How should I arrange my freezer?
I recommend organizing your freezer into zones so everything has a clear home. Try creating areas for protein (like frozen chicken or beef), grains (rice, quinoa), frozen soups, cooked meals, and even fruit and veggies. Within each zone, place the oldest items at the front and newer ones at the back so you’re always using things before they expire.
How do I maximize space?
In order to maximize space in your freezer, freeze any items in Ziploc bags so they’re flat then store them upright. I’d highly recommend vacuum sealing, which will make the most of the space you have! You can also use storage bins and baskets to make sure everything stays nice and organized.
What storage bins or bags are best for the freezer?
Make sure your containers are labeled freezer-safe so they don’t crack in the cold. I love clear bins so you can easily see what’s inside. Ziploc freezer bags and silicone resealable bags are always on hand, I use them all the time. Here are all the essentials I use to keep my freezer organized:
- Clear storage bins
- Ziplock large and small freezer bags
- Stasher silicone reusable bags
- Souper Cubes silicone trays
- Bag clips
- Labels
- Sharpie
Share With Me!
Did you make this recipe or want to share your thoughts? Make sure to leave your review below and tag me on Instagram #thegirlonbloor so I can check it out!